Here’s How to Build a Cool Crossword Puzzle for Storyline in No Time

As e-learning designers, we’re always looking for ways to jazz up our courses—and a fun way to do this is to incorporate simple games into your e-learning. I recently created this crossword puzzle template in Articulate Storyline 2.

I think it would be a great interaction to adapt into an informal knowledge check or quiz about your courses’ subject matter. Let me break down the process for you of how easy it is to create this interaction.
Create Words with Text Entry Fields
The key to this crossword puzzle is the use of data entry fields, which is the first step. Insert a small, square-shaped text entry field, then duplicate it until you have one text entry field for every letter in the crossword puzzle. At this point, it helps to actually type the letter into the text entry fields to spell out the words and make sure you have the right amount of boxes. We’ll remove those letters later.
In my example, I started by laying out the horizontal row that spells out the word “elearning,” then I laid out the vertical row, which is the word “heroes.” At this point, my slide looked like this:
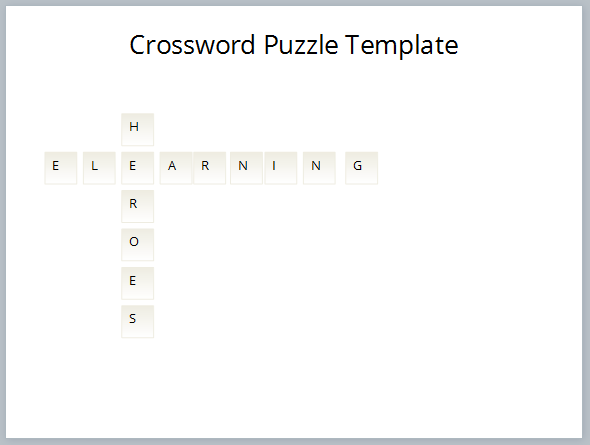
With these text entry fields in place, I quickly styled them by selecting them all and editing the fill and outline color. A great way to line up the text entry fields perfectly is to use the align feature under the format tab on the Storyline ribbon.
Add the Other Slide Elements
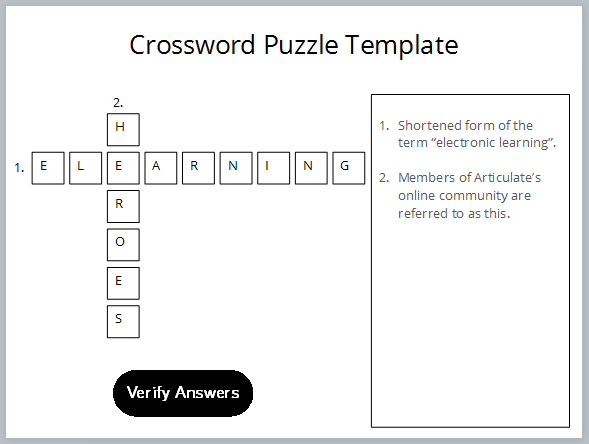
I needed to add a few more important elements to my slide to get this interaction working. First, I added an area on the template to put the hints for each word. Then I inserted the corresponding number next to the word in the crossword puzzle. Finally, I inserted the button that users click to check whether their answers are correct. See how it’s starting to come together?
Now that I have the basics in place, it’s time to create a couple of feedback layers that will tell users whether their answers are correct.
Create the Feedback Layers
It’s often a challenge for instructional designers to decide how and when to provide feedback. In this case, I decided that the best approach was to give learners the standard two feedback types: correct and incorrect. One says all the words in the puzzle are correct, and the other indicates there’s at least one incorrect word in the grid. However, the feedback doesn’t elaborate as to which word is incorrect—it’s up to the learners to figure out where they went wrong.
I first created the “correct” layer by inserting a new layer on my slide. To create my feedback area, I inserted a rectangle shape over the top of the hint area with the correct feedback text and made the rectangle green to indicate a visual sign that it’s correct. I also added a button to exit the game, since once all the answers are filled in correctly the game is done.

With everything right on my first layer, I duplicated it and edited the text and shape color for incorrect feedback. On this layer, the slide lets the learner return to the game to keep trying instead of exiting.

Don’t forget to pop into your Layer Properties for both feedback layers and to check off the option to “prevent the user from clicking on the base layer,” which keeps learners from working on the crossword puzzle until they’ve closed the feedback layer.

We’re almost done! The slide elements are in place and the feedback layers are all set. The last step to get this interaction working is to add the triggers.
Add Triggers to Create Interactivity
I only need two triggers for this crossword puzzle, which I’ll add to the “Verify Answers” button.
The logic behind the first trigger is: check that every text entry field has the correct value (letter) typed in it, and if they are ALL correct, show the “correct” feedback layer.
The logic behind the second trigger is: if even one text entry field has the incorrect value in it, show the “incorrect” feedback layer.
With the logic planned out, I created the trigger that will show the “correct” feedback layer. The first part is really easy, “Show the Correct Layer when the User Clicks the Verify Button.”

Now here’s where the real magic happens: we add conditions to the trigger. Conditions are basically if/then statements that let you fine-tune a trigger to happen only when specific criteria are met. To add a condition, simply click the “Show Conditions” button shown in the image above, and then the “Plus” icon once it’s open. The trigger condition window will look like this:

It says: it will only show the correct feedback layer if the “TextEntry28” value is equal to the letter e (and it doesn’t matter if it’s a capital or small e).
Remember to ensure that each text entry variable corresponds to the correct value. Take a look at the image below. The first “e” in the word “elearning” is selected, and you can see that it’s corresponding text entry variable is identified in the triggers panel, “TextEntry28,” where it is highlighted in blue.

With conditions created for each letter in the crossword, there will be a long list of conditions, with the word “AND” between all of them. The “AND” is necessary since all of the letters need to be spelled correctly in the puzzle. The image below shows how the Trigger Wizard should look:

To save time, I duplicated this trigger and updated this one to show the “incorrect” feedback layer instead. Under the conditions, change each “AND” to an “OR” and change each “Equal to (ignore case)” to “Not equal to (ignore case).” This means that if even just one of any of those text entry fields has the wrong value in it, it will show the “incorrect” layer. The Trigger Wizard should look something like this:

These two triggers are all you need to get this interaction working. Remember: it's all about getting the conditions just right.
Once the interaction is working just right, you'll want to take a few moments to style your slide. Consider adding in a few pops of color and updating your font styles. You also need to remove all the letters from the text entry fields and leave them blank. Here’s a look at the final product:

There you have it: those are the simple steps I followed to create a game interaction in Storyline in just a few minutes. When it comes to adding aspects of gamification to your course, features such as the variables and data entry fields will be some of your go-to tools for creating fun and engaging content. Head on over to the Downloads section to grab this template, and leave me a comment to let me know if you have any questions.
Want to try something you learned here, but don’t have Articulate software? Download a free 30-day trial, and come back to E-Learning Heroes regularly for more helpful advice on everything related to e-learning.
9 Comments