powerpoint
11 TopicsADDIE Adventure
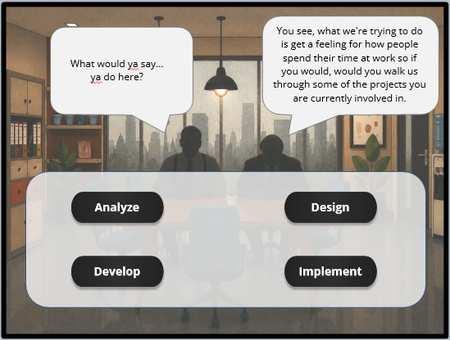
I was once again checking out the different projects that people have shown off and DavidTaits Escape Room | E-Learning Heroes caught my attention. I appreciated his explanation on ho he had the transitions work. During my recent 1on1s with my leader, she challenged me to look into the ADDIE model. At The same time I had been experimenting with some new technical "programming" in storyline while also trying to recreate some of Davids design and I mistakenly mixed some of my ADDIE learning into the SL learning and accidently made a little ADDIE adventure learning module. I was trying to find a way to take information from a drag and drop or multiple choice question and use it in a later slide in order to give more in depth feedback. My solution was to have multiple states for the drop area that translated into a numeric variable that could be recalled later on for more in depth feedback. In my version you find info on each stage of the ADDIE model and then have to use that to determine how to Analyze some issues a team is having and break it up into categories; if the issues are training related, environment related or a knowledge/skill issue. Then look at options for how to design a course and which elements you want to include, from simulations to if a cat video is necessary. Decide which Development tools are best for the task at hand. Is Storyline, Canva, Photoshop, Rise or PowerPoint the way to go. Finally order the best steps for implementation. Once those are completed you will go to a meeting and see if your answers are what management was looking for and get 1 of 5 endings based on those results. ADDIE Adventure | Review 360356Views2likes3Comments3-D Spinning Wheel in Storyline
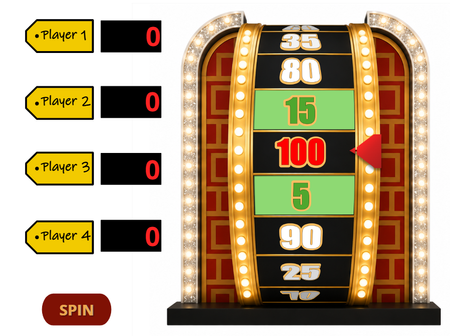
I wanted to create a game-show-style wheel in Storyline, but with a twist: instead of a flat wheel spinning in a circle, I wanted a vertical wheel that appeared to spin toward the viewer. I had trouble finding an example of this type of interaction, so I decided to create the illusion using image states, cue points, and variables. https://360.articulate.com/review/content/41bac6dd-0026-4d4d-a0b7-a67c96696c90/review Creating the Spinning Illusion The spinning effect illusion is created with a background image that has 20 different states rather than 3-D animation. In each state, the numbers move down one position on the wheel. To create the illusion of a curved wheel, the numbers in the center are larger, and the numbers toward the top and bottom are shorter, angled, and darker with text effects options. When the states are displayed quickly in sequence, the wheel appears to rotate. To be honest, I was surprised that it worked since the lines between the spaces are static, but it actually looks like it is spinning. Creating the Wheel Graphic with AI I used ChatGPT to create the base wheel image, which took a little trial and error. I started by uploading a link to a video showing a wheel similar to what I wanted and asked ChatGPT to generate sample flat images of the wheel in 12 states that I could use as a reference for the different wheel positions. The first attempt helped me visualize the concept. I liked how the sections were larger in the middle and became smaller toward the top and bottom, but several details weren't quite right. The 50 section changes colors at it rotates, the red and green sections weren't positioned correctly, the pointer was already part of the image, and the numbers where not the ones I wanted. For the next version, I decided it would be easier to add the numbers myself. I prompted ChatGPT to create a single wheel image without numbers, with 20 spaces and a red section between two green sections. This was closer, but there were still too many wheel sections visible, and it had a black section between the red and green sections. For the final iteration, I simplified the prompt. I asked ChatGPT to make all of the wheel sections black, remove the pointer, and show only eight sections of the wheel at a time. This gave me the base graphic I needed. I could then control the numbers, colors, and pointer myself instead of relying on AI to reproduce those details consistently across multiple images. Building 20 Wheel Positions I brought the final wheel graphic into PowerPoint to create the 20 images needed for the Storyline states. I added the numbers, adjusted the font shape in text effect for the top and bottom numbers, and used custom shapes to create the colored wheel sections. One helpful trick was to change the PowerPoint slide size to a square and position the wheel graphic in the exact center and middle of the slide. This helped me to make sure the image was in the same position on each slide so that the states wouldn't wobble when I import them in Storyline. I then duplicated the slide and changed the numbers to move them down one wheel position for each successive slide. Once all 20 positions were complete, I exported the PowerPoint slides as PNG files. PowerPoint automatically saved each slide as a separate image in a folder. Back in Storyline, I opened the wheel object's Edit States window and used the picture icon to insert the exported images. I added all 20 images at once, and Storyline created all of the individual states. The pointer is a separate shape that I created using Merge Shapes in Storyline. Keeping it separate from the wheel image allows the wheel to move underneath it. I also added a shadow to the pointer to help create the illusion that it sits above the wheel. Making the Wheel Spin The wheel animation uses 20 cue points, 20 image states, and state-change triggers. At each cue point, a trigger changes the wheel to the next state (at cue point 1, change to state 1; at cue point 2, change to state 2; etc.) The animation occurs on several Storyline layers. The cue points are close together on the first layer and become progressively farther apart on subsequent layers to make it look like the spinning speed slows as it stops. Stopping the Wheel Randomly Getting the wheel to stop on a random position was one of the trickier parts. I created a number variable (WheelResult) and created a trigger to adjust the variable to a random number when the user clicks on the spin button. On the final spinning layer, the wheel continues moving through its states. Each cue point has a conditional trigger that pauses the timeline when the cue point matches WheelResult. For example: Pause timeline when timeline reaches Cue Point 7 if WheelResult = 7. I then added triggers to translate the WheelResult number into a corresponding score to add to the player's score. Adding Wheel Sounds The beeping and applause sounds are free downloads from Pixabay. Initially, I added a Play Media trigger at every cue point so the pointer flapper would make a sound each time the wheel moved to the next position. This worked well on the first spin but became sporadic on subsequent spins, particularly during the fastest portion of the animation. I think Storyline had trouble with an audio playback limit with so many overlapping audio files. To make the audio more reliable, I combined the rapid beeps into one audio track for each spinning layer. The timing of the beeps in the audio file corresponds with the cue points on that layer so that each layer plays one audio track. Finishing Touches To finish the game-show effect, I added applause and confetti when the final results are displayed. The confetti effect uses JavaScript based on an example shared by Jay Chun in his YouTube tutorial. [https://youtu.be/vXOdJt37SpQ?si=KZlcDdr6rCep550p]149Views1like0CommentsCreate an Animation for Rise Using PowerPoint
If you create something like this flowchart in PowerPoint, then add in a fade-in animation to each item, set the animation to happen "After Previous" (automatically). (time to play through 1 second). Duplicate the slide - set each item to have no animation. Go back to first slide - add a transition - NONE but set it to Advance slide after X seconds (where X is the same length of time as it takes for the animation to play [example 1 second) Go to second slide - add a transition - MORPH and have it Advance Slide after Y seconds (where Y is the length of time before the animation loops again [example 10 seconds]) Then you can add this animation directly into a Rise Image Block (or elsewhere) You can also change the slide size in PPT to reduce the white space around the animation. Example (chart 4.gif) I changed the slide size to half the height First animation (chart.gif) - no 2nd slide Second animation (chart 3.gif) - 10 second 2nd slide595Views7likes4CommentsTreasure Hunters Learning Game
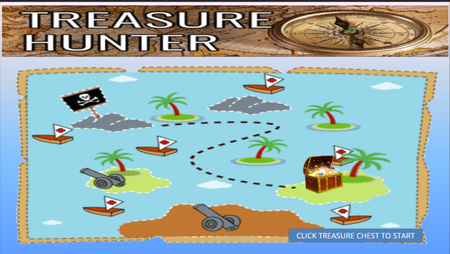
Before I officially became an ID I worked in a job that encouraged self-learning and would give us time to take e-learning. One of the e-learning I became focused on was PowerPoint. This led to me making games in my free time one game was a Pirates adventure that I repurposed to be a trivia game for learning a new process at work. This was long before I became an ID but was laying the groundwork for this path. When I became an ID I was introduced to Storyline and was told it is PowerPoint on steroids. For my first couple week I was encouraged to play around, watch videos, come here and look at what other can and have done. I took that time to remake the game using Storyline and enhanced it with branching options. This is the result after those 2 weeks. I really wanted to see if my PowerPoint skills and translated to Storyline and see how I could push it. I thought I would share it and maybe inspire others I have been by this community. https://360.articulate.com/review/content/ba0f4bcc-5d69-4d22-9b6d-acb7c644c254/review1KViews4likes6CommentsWorkplace Violence and Harassment – Game-Based Scenario
One of our recent projects involved developed a game-based, scenario-driven Custom eLearning Solution focused on Workplace Violence and Harassment Training. As part of our broader corporate training solutions and digital learning services, the goal was to move beyond traditional click-through compliance courses and create a learning experience where employees actively practice real-world decision-making. What we built: A scenario-driven course with 1–4 progressive levels Each level presents realistic workplace situations that require learner judgment Learners complete a knowledge check or quiz at the end of each level Successful completion unlocks a badge, reinforcing motivation and progression Why this project matters: Rather than relying on a traditional, click-through compliance approach, we designed this eLearning course to help learners practice real-world decision-making in a safe environment, supporting better recognition, prevention and response to workplace violence and harassment. Behind the scenes: Branching scenarios were designed to encourage reflection, not just right-or-wrong answers Feedback carefully crafted to explain why a response is appropriate Game mechanics were applied thoughtfully to maintain the seriousness of the topic What this project reinforced for us: When designed with intent, gamification can enhance engagement and retention, even for sensitive compliance topics. Tools used: Articulate Storyline 360 for course development Vyond for video creation Learning outcome: Participants will be able to identify, prevent and appropriately respond to workplace violence and harassment situations through practical, scenario-based decision-making. Explore the course: Click the link below to view the course. https://www.swiftelearningservices.com/our-portfolio/game-based-scenario-sample/story.html We welcome your feedback, questions and suggestions, especially around scenario design, feedback strategies and gamification for sensitive compliance topics.2.1KViews5likes6CommentsFrom Motion Paths to Murder Mysteries: My 2024 E-Learning Adventure
When I started 2024 with a simple 0px motion path challenge, little did I know I'd end up orchestrating murder mysteries and guiding virtual safari adventures! What began as technical experimentation became a year of pushing creative boundaries and discovering new possibilities in e-learning design. Each challenge became a stepping stone to something more ambitious. From helping art lovers restore masterpieces in a forgotten gallery to creating an AI-powered pet adoption center, every project taught me something new. I found myself weaving stories, building immersive experiences, and even launching my own spooky podcast platform (Jay-tify, anyone?). Here's my journey through 2024's e-learning challenges, where every project started with "What if..." and ended with "Wow, I actually did that!" Challenge #445: How Can You Use This Motion Path Tip in Your E-Learning Projects? My first adventure began with "Guess Your Monthly Hydration," where I explored the innovative 0px length motion path technique. Drawing inspiration from David and Andreas Fischer's work, I created an interactive experience that made learning about hydration engaging and fun. View My Entry Challenge #447: Spotlight Masking Effects for Discovery Activities In "Ruined Gallery Adventure," I transformed learners into art enthusiasts exploring a forgotten sanctuary. Armed with just a torchlight, they discover and restore hidden masterpieces, bringing art back to life. This project combined technical masking effects with storytelling to create an immersive learning experience. View My Entry Challenge #448: Using Tabs Interactions in E-Learning Who says learning can't be delicious? I cooked up an interactive feast featuring 8 mouth-watering Indian recipes, all organized behind interactive tabs. This project combined my love for cooking with interactive design. View My Entry Challenge #452: Show How You're Using AI to Create E-Learning Courses Stepping into the future, I created the AI Pet Adoption Center. This project showcased the power of combining ChatGPT for content, Midjourney for lifelike pet images, and WellSaid Labs for natural AI voiceovers. View My Entry Challenge #454: Using Text, True/False, and Number Variables Talk about pressure! In this challenge, I created a high-stakes "Bomb Defusing Challenge" where learners must decode and make split-second decisions. It's amazing how variables can create such intense learning experiences! View My Entry Challenge #455: Asking vs. Telling: Creating Interactive E-Learning I tackled the age-old push vs. pull dilemma in e-learning through an innovative onboarding experience. By comparing traditional slides with interactive branching scenarios, I demonstrated how engagement can transform learning about company values. View My Entry Challenge #456: How Are Designers Using Phat Fonts in E-Learning? Who says fonts can't be fun? I created a spooky haunted mansion course where chunky fonts became part of the adventure, proving that typography can be both functional and entertaining. View My Entry Challenge #457: Mix and Match Your Own E-Learning Challenges A dream came true with this one! I finally brought my long-awaited murder mystery to life, combining elements from seven different challenges. This project showcases how different techniques can come together to create something truly unique. View My Entry Challenge #461: Audio Interviews with E-Learning Challenge Heroes Introducing Jay-tify! I created a simulated podcast platform where I shared my insights about participating in these challenges. It was a unique way to reflect on my e-learning journey. View My Entry Challenge #467: Creating Immersive Learning Experiences with 360° Images Ready for a safari? I took learners on a virtual animal adventure, proving that immersive learning can transport us anywhere. View My Entry Challenge #469: How I Became an E-Learning Instructional Designer I shared my personal journey from a Computer Science graduate in Chennai to a Learning Designer in Singapore, reflecting on a decade of growth and transformation in the field. View My Entry Looking back at these challenges, I'm amazed at how each one pushed me to explore new possibilities in e-learning design. From technical challenges to creative storytelling, from AI integration to immersive experiences, 2024 has been a year of growth, learning, and endless creativity. Here's to more adventures in 2025!976Views2likes0Comments- 716Views1like0Comments