sliders
10 TopicsE-Learning Challenge: Scuba Diver
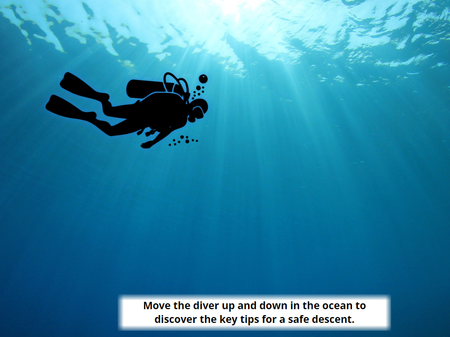
Hello! This was my first attempt at creating an interaction in Articulate Storyline, having previously focused mainly on developing content with the Articulate 360 AI tools. I enjoy scuba diving so thought I'd create an activity around this topic! The activity reminds scuba divers about the key principles of a safe descent. Learners move a slider to guide the diver down through the water, revealing safety tips as they descend. Moving the slider back up causes the tips to disappear, allowing learners to explore the content interactively at their own pace. Sources - I used Canva for the diver icon and the background image, I used Pixabay sounds for the underwater sound. E-Learning Challenge (Scuba Diver) Link!Bridgnorth Cliff Railway
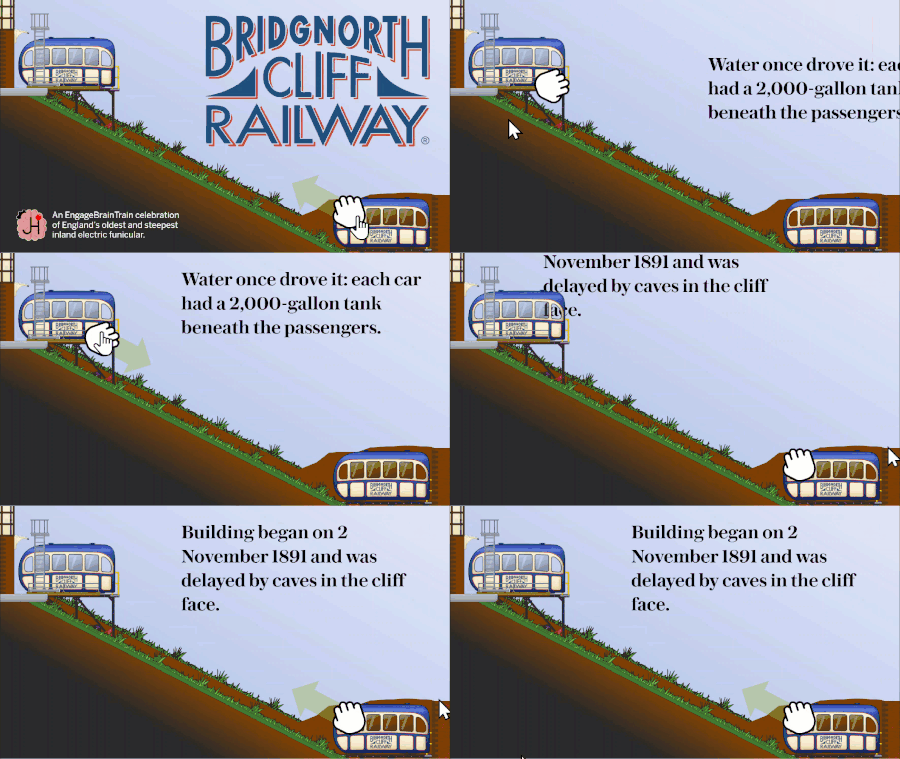
Hello! For this week's challenge, I have have built a demo based on a local tourist attraction: Bridgnorth Cliff Railway. Both trains and the 'grab' icon are customised sliders set to a 27 degree angle, with the thumb replaced by an image. I first used this technique way back in Challenge 336 (Digital Magazines), which featured an angled slider that looked like the elevator on the Eiffel Tower. In this demo, there are three sliders all tied to the same variable. But the train sliders run in opposite directions, mimicking how a fernicular railway works in real life. bottom and ascends when Train_Position decreases top and descends when Train_Position decreases. Each time the text box displaying the facts about the railway leaves the slide, some JavaScript generates another fact to replace it. There are 24 facts, presented in groups of 6. The facts always appear in a random order, and will never repeat during a draw of 24. Ride the rails here: https://bit.ly/elhc573 If you have any more questions about this demo, just ask.Using Sliders for Exploration Activities in E-Learning #573
When most of us think about sliders in online training, we picture adjusting numbers, comparing values, or exploring cause and effect. Move the slider, and something changes. But sliders aren’t just for data. They also give learners a hands-on way to explore images, documents, diagrams, and other visual content. Instead of clicking through a series of buttons, learners drag a slider to uncover details one step at a time. It’s a simple twist on the ususual click-and-reveal interaction and it can turn a dense document or busy diagram into something learners actually want to explore. Check out this fantastic example from JodiSansone: View the project | Download the source 🏆 Challenge of the week This week, your challenge is to put a slider to work as an exploration tool. Your slider might reveal different parts of an image, highlight key details in a document, or walk learners through a visual process. It's up to you what you want to build. Just show us what a slider can do when it’s not crunching numbers. 🚀 Tips for getting started Jump in at whatever level works best for you: Start simple: Use a slider to reveal different parts of an image or diagram. As learners move the slider, show labels or descriptions that explain what they’re seeing. Level up: Build a document exploration activity like Jodi's REAL ID example. Use slider positions to highlight specific areas of the document and display a supporting explanation for each one. Challenge mode: Create a more advanced visual exploration where the slider controls animations, transitions, or a sequence of events. Possible examples include: product walkthroughs, before-and-after comparisons, or step-by-step processes. 🙌 Share Your Work You put in the effort. Now make sure your work gets seen: Personal blog: If you have a blog, write about your example from this week's challenge and share the link with your submission. Social media: Share your examples on LinkedIn and mention both David and Articulate using the #ElearningChallenge tag so we can help promote your work. Peer feedback: Try leaving helpful feedback on at least three projects this week. Community forums: Cross-post in the forums to give your work even more visibility. 🙌 Last Week’s Challenge: Before you scrub through this week’s challenge, treat yourself to the creatively haunting designs shared in last week's Halloween challenge: What's Your Favorite Scary E-Learning Course? #572: Challenge | Recap 👋 New to the E-Learning Challenges? The weekly e-learning challenges are ongoing opportunities to learn, share, and build your e-learning portfolios. You can jump into any or all of the previous challenges anytime you want. I’ll update the recap posts to include your demos. Learn more about the challenges in this Q&A post and why and how to participate in this helpful article.453Views2likes0CommentsSlider Drag and Drop
I built this as a quick example that might spark some inspiration for others. The learner can drag the document, use their arrow keys, or select the folders themselves. You'll notice it is a freeform pick one quiz question so there are triggers that change the state of the folders based on the value of the slider's variable.Travel Alberta Slider Game
https://360.articulate.com/review/content/53628b3e-d00e-4c31-aca4-6d4d9ac6c704/review My entry for the Using Sliders for Accessible Drag-and-Drop Interactions weekly challenge. Using the slider you can go north or south across the province of Alberta and click on some of the cities to answer trivia. THE BUILD. A total of 8 sliders make this up. Each of the 6 icons on the map is its own slider that is linked to the main slider so they all move in unison. Of course, the map itself is a slider as well, and once again attached to the main slider. That's all there really is to it. The hard part was adjusting the size of the map as a thumb so that is fit properly on the slide.Need to Know? Sorting Doug's 200 Slides 📄😱
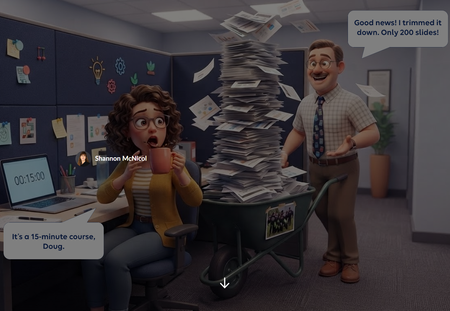
We've all met Doug. Doug is a lovely SME who knows everything, and he just rolled 200 slides into your cubicle for a 15 minute course. "Good news! I trimmed it down!" 🙃 For this week's challenge, I turned that moment into a sorting activity. Learners drag each of Doug's slides into one of three zones: Need to Know (teach it), Nice to Know (link it), or Never to Know (cut it, kindly). Then they hit Submit, and Doug weighs in. Try sending his paintball offsite photo to the cut zone and see what happens. 🎯 Why a slider? Drag and drop isn't fully keyboard accessible yet, and this interaction only needs to move one way: left to right. So the slide card rides on a slider. Learners can grab the card or the slider button with a mouse, or tab to it and use the arrow keys. Screen readers hear which zone the slide is in, not a random number. Same feel as drag and drop, and everyone gets to play. 🙌 What I learned: Get one axis right before anything else. If the movement only goes one way, a slider gives you drag and drop feel with accessibility built in. Feedback with personality sticks. Doug reacts differently depending on where you drop each slide. It's funny, but it also shows why something belongs in a zone. Show the payoff. The end screen compares Doug's 3 hr 40 min version with your trimmed course. That's the real lesson for any LED. ⏱️ Shout out to Claude, my co-creator for the build. Doug and our caffeinated LED were brought to life with Articulate's AI image generation. ☕🤖 👉 The SME Content Dump Have you ever had a Doug? What's the wildest slide you've had to cut? 😂Using Sliders for Accessible Drag-and-Drop Interactions #569
Drag-and-drop is one of the most flexible features in Storyline. With freeform drag-and-drop, you can use images, text, shapes, and graphics to build almost any interaction you can dream up. There's one catch, though: drag-and-drops aren't fully keyboard accessible yet. That can leave some learners out when you want everyone to take part. If your interaction only needs to move in one direction (side to side or up and down), there's another object that works beautifully: the slider. Sliders for Drag-And-Drop Interactions? Most of us reach for sliders to compare values, explore data, or add quick microinteractions. But with a little customization, they can power drag-and-drop-style interactions that work with a keyboard and keep movement locked to the X or Y axis. Aman shows just how well this works in his typography example. View the example The first time I saw it, I thought, "Wait, how'd he do that?" The trick is surprisingly simple when you understand how sliders work. Aman swapped the standard slider thumb for a letter graphic. Now learners can move that letter left and right or up and down, just like they would in a drag interaction. And because sliders are tied to variables, you can make things happen when the values change. That makes sliders a great fit for typography concepts like kerning and leading, where learners need to move an object in only one direction. With a little customization, a slider can measure distance, set an object's position, or step through a sequence. It can even stand in for drag-and-drop, and that's exactly what this week's challenge is all about! 🏆 Challenge of the Week This week, your e-learning challenge is to share an example that shows how you can use sliders to build drag-and-drop-style interactions. Go beyond traditional number scales and use sliders to explore concepts like distance, position, sequence, intensity, or other relationships that benefit from hands-on movement. 🙌 Share Your Work You put in the effort. Now make sure your work gets seen: Personal blog: If you have a blog, write about your example from this week's challenge and share the link with your submission. Social media: Share your examples on LinkedIn and mention both David and Articulate using the #ElearningChallenge tag so we can help promote your work. Peer feedback: Try leaving helpful feedback on at least three projects this week. Community forums: Cross-post in the forums to give your work even more visibility. 🙌 Last Week’s Challenge: Before you slide into this week's challenge, check out the interactive video examples your fellow community members shared over the past week: Turning Video Into Learning Experiences #568: Challenge | Recap 👋 New to the E-Learning Challenges? The weekly e-learning challenges are ongoing opportunities to learn, share, and build your e-learning portfolios. You can jump into any or all of the previous challenges anytime you want. I’ll update the recap posts to include your demos. Learn more about the challenges in this Q&A post and why and how to participate in this helpful article.1.4KViews2likes0CommentsHow to Turn a Slider into a Quiz Question
This tip comes from our certified training partner, Yukon Learning. Sliders a fun way to create interactive elements on a slide in Storyline, and you may have used them to do things like show a timeline of events or even used them in a gamified slide. But did you know that you can you use them to answer quiz questions? In this video, we'll show you how to use slider values to control a freeform multiple choice question. You'll learn how to: Add a slider to your freeform quiz slide Adjust slider design properties Link slider stopping points to quiz answers using triggers Resources: Yukon Learning YouTube Channel Sign Up for Facilitated Certified Training312Views2likes0CommentsSnapshot graphics + click-and-reveal = engaging cybersecurity learning
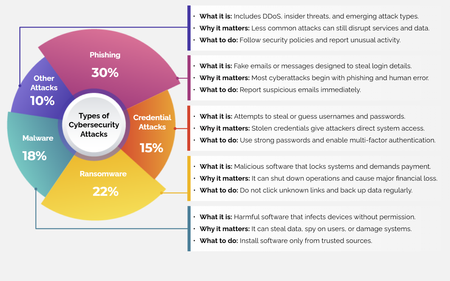
For this week’s challenge, we used snapshot graphics and a click-and-reveal interaction to help learners quickly recognize common cyber attacks—without overwhelming them. View the activity using the link below. https://www.swiftelearningservices.com/custom-elearning-snapshot-graphics-click-reveal-cyber-security-attacks/265Views2likes0CommentsTip of the Iceberg
Happy New Year! When I take part in a Challenge, I'm often asked, "How long did it take you to build that demo, Jon?" The answer can vary, depending on whether I'm experimenting with a new feature, revisiting an earlier concept, or building something completely new. What you see is just "the tip of the iceberg". The next question is: "Is the juice worth the squeeze?" Maybe. Maybe not. Depends on the project, your audience, and the subject matter. Remember, interaction doesn't always aid knowledge transfer. But by regularly practicing with your tools, you can bring your development time down, and make interactions like this one more viable on a real project. Click below to test the demo for yourself, and let me know what you think. https://bit.ly/elhc536 425Views3likes2Comments