user guide
58 Topics4 Impactful E-Learning Trends for 2023
E-learning has evolved over the years, which is great! As we discover more about the industry and how people learn, we can improve the way we deliver online content to better the lives of those who consume it. So, what current learning strategies are proving successful for other organizations? Let’s look at the top e-learning trends for 2023 that will have a lasting impact on the future of learning. 1. Data-driven decisions Since reporting tools have advanced over the years, we now have access to more learner insights than ever before. So instead of creating courses based on what you think learners need, you can use data to drive your online learning decisions. Taking the time to analyze and evaluate learner metrics will help drive meaningful changes to your learning strategies. 2. On-demand content Organizations are realizing the need to empower employees by creating content learners can pull from when they need it. Let’s say you’re a sales manager who plans to hire three new employees. There are a lot of details these new team members will need to do their jobs. Giving them all that information at once might make them feel like they’re drinking from a firehose and will probably guarantee most of it will be forgotten. Creating a series of microlearning courses that walk them through your processes will prove to be more effective and a better use of everyone’s time. Plus, if they need to refer back to anything later, they can! So, designing content learners can access when they need it is definitely something to consider implementing. 3. Accessible experiences You may have seen accessible learning as a trend in previous years. Well, this repeating trend is here to stay. That’s because it’s becoming a standard, as it should! We want all learners to understand, navigate, and interact with the content. If you’re new to accessibility, it might feel like creating accessible learning experiences is more work. But as Elizabeth Pawlicki put it, “Accessibility isn’t extra steps. It’s the steps you missed.” Now, course creators are designing accessible courses right from the start rather than building a course and retrofitting it to make it accessible later on. 4. Continuous development With a record number of people leaving their jobs, it’s important to show current employees you value their contributions and want them to grow with the company. One way to do that is to provide them with more opportunities to expand their knowledge and skills in a changing world. By creating and offering training on a variety of topics to help them advance their careers, you’re showing them you value their contributions. So if you want to retain talent and help employees thrive, creating and providing lifelong learning opportunities will help you (and them) succeed. Wrap-Up With so many lessons learned from the past and an abundant amount of resources to move forward, e-learning designers are bound to make a difference in the learning space this year. As we dive more into data, create content learners can pull from when they need it, design courses that everyone can access, and provide opportunities for continued growth, we can all positively impact the lives of our learners. Of course, there are more ways to improve learning outcomes than just the ones listed here. So if you’ve spotted any other trends you think will make an impact in 2023, please share your ideas below! Follow us on Twitter and LinkedIn and come back to E-Learning Heroes regularly for more helpful advice on everything related to e-learning. If you have any questions, please share them in the comments.596Views0likes3Comments6 Things to Consider Before Choosing a Company Name
Are you looking to venture off on your own—either as a consultant, freelancer, or something else? If you’ve been working in the corporate training world, then you likely already know that a great company name is a critical step toward success. Choosing the right name can jumpstart your side hustle or new career. Alternatively, picking the wrong name can pose tricky challenges you didn’t expect. So, before you make a final decision, ask yourself the following questions: 1. Should you use your own name or a business name? First, do you want to use your own name or a business name? Either option can work—the correct answer just depends on your particular goals. If you’ve already made a name for yourself in the industry, using your own name might make it easier to gain business. Plus, it’ll give customers the sense of a personal touch. Still, it can also impose limitations, such as making your company seem too small for larger jobs—even if you hire staff later down the road. Conversely, using a unique company name clearly communicates what you’re all about and leaves room to grow. The downside is that you’ll also have to build a positive reputation from the ground up. The right option requires getting familiar with the advantages and disadvantages on both sides of the coin. So, keep exploring, and don’t hesitate to use others for inspiration. Check out this article to read how others in the industry chose their company names. 2. Does the name sound too similar to competitors? Ready yourself for success by choosing a name that sets you apart. You never want potential customers to confuse your name with that of another business in the same or even a different industry. Just imagine the headache of getting a bunch of messages or calls intended for another similar-sounding organization! So, search for your desired business name on the internet. Are you in the clear, or is another company already using it? Make adjustments as needed until your name is one-of-a-kind. With your own unique company name, your business can thrive as its own brand and identity. 3. Can you spell and say the name easily? If you’re having trouble finding a name that isn’t already taken, you might feel tempted to use a creative misspelling—like the rideshare company Lyft. But that’s probably not a good idea unless you have tons of money to spend on building brand awareness. Besides, you’ll likely grow tired of having to constantly correct people if the misspelling makes the name harder to say. So, choose a name you can spell and pronounce easily. That way, people are more likely to remember it, recommend it, and quickly find it when they type your company name into a search field. 4. Can you register the URL? Establishing a URL/domain (.com preferably) gives the impression that you’re a professional, and it provides a place for potential customers to learn what you’re all about. Even if you don't plan to create a website right away, reserving a URL ensures that no one else takes it down the line. So, confirm whether you can get a domain that matches your desired company name. As your company grows, you’ll be grateful to have it. 5. Is the name available on social media? You can also grow your business with social media—sharing engaging content that attracts new customers to your door. So, make sure your desired company name is available on those platforms as well. Sound like a lot of work? Don’t stress! Your business doesn’t need to be on every social media platform. You can focus your efforts. Consider your target audience and where they’re most likely to spend their time. Or speed things up even more by recruiting the help of websites like namecheckr—which allows you to check a potential brand name’s availability on multiple social media sites at once. 6. Do you like the name? A company name is something that will be with you for a long time, so make sure you’re happy with it. While it’s great to get feedback from others—especially for bringing potential drawbacks to light—this is ultimately your decision. You get to decide whether it’s a name you’d be proud to call your business. Choose something you’ll be thrilled to say over and over again to all your future clients. In Summary As you can tell, there are a few things to consider before deciding on a company name. I hope this article makes it easier for you to confidently choose one that best suits your goals, stands out from the pack, and is easy for customers to remember and find online. And—most of all—I hope it’s a name you love! Looking for more ways to grow your future company? Check out the following resources for more ideas: No-Fail Strategies to Succeed as an E-Learning Freelancer (Part 1/2) No-Fail Strategies to Succeed as an E-Learning Freelancer (Part 2/2) 19 Tips for Succeeding as Freelance E-Learning Designers #348 Follow us on Twitter and come back to E-Learning Heroes regularly for more helpful advice on everything related to e-learning. If you have any questions, please share them in the comments.197Views0likes0Comments5 Inspiring Font Pairings for Your Next E-Learning Project
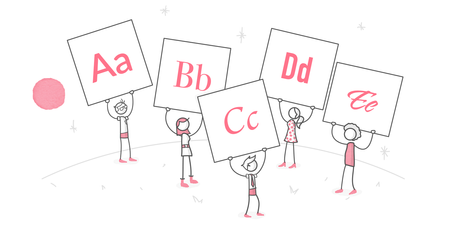
Look at any e-learning project and one of the first things you’ll notice are the fonts. Theme fonts set the stage. They establish a project’s tone—and they make a big difference in helping learners read content more easily. But, with so many options to choose from, how can you possibly pick? Thankfully, you don’t have to search online for the perfect heading and body fonts. You can simply mix and match the built-in Storyline 360 fonts and system typefaces to make your content look polished and legible. Curious to see which fonts work well together? Take a look at these five pairings you can start using right away! 1. Montserrat Medium & Montserrat Want to combine similar fonts without falling into the “it’s boring” trap? Try pairing Montserrat Medium with Montserrat. These two fonts have the same base—just with different line thicknesses. The result is an engaging, easy-on-the-eye contrast. Together, these fonts create a sense of strength and tranquility. And because of their versatility and geometric lettering, the fonts are generally safe for any project. 2. Georgia & Verdana Pairing different fonts can sometimes feel daunting. How do you know which ones to mix and match? What if you end up combining fonts that conflict instead of contrast? Choose Georgia and Verdana and you can put those worries aside, as these two fonts were designed to work together. The elegant simplicity of Georgia combined with the clear and legible Verdana font makes this classic combo a nice choice for your projects. 3. Trebuchet MS & Garamond Need a fresh look? Sometimes combining the old with the new can give a sense of unique familiarity. To capture that balance, try Trebuchet MS and Garamond. The modern Trebuchet MS paired with Garamond—one of the oldest fonts—emits a friendly and sophisticated tone, giving you the best of both worlds. 4. Oswald & Open Sans The best font pairings have visual contrast—but that contrast can't look disjointed. After all, we still need to maintain cohesiveness. Use Oswald and Open Sans to create that ideal match. Oswald’s slightly elongated characteristics combine beautifully with many fonts. Match it with the neutral and friendly Open Sans and you’ll have a distinct and professional pairing that’s instantly pleasing to the eye. 5. Raleway & Roboto Light Need to add some personality to your projects? Look no further than the dynamic Raleway and Roboto Light duo. This sleek and modern font combination is the perfect mix! Raleway works great as a heading because its subtle, artistic look attracts just the right amount of attention. Roboto Light body text completes the picture because it’s versatile and easy to read. Wrap-Up Using any of these font combinations can help your courses look captivating, professional, and readable. And since anyone using Storyline 360 already has these fonts installed, you can easily share your file and rest assured knowing the text formatting will stay intact! Of course, these are just a few pairing options; we’re sure you have many other creative ideas up your sleeve. We’d love to hear them! Which built-in fonts are your go-tos for headings and body text? For more typography tips, check out these articles: 8 Questions to Ask When Choosing Fonts & Formatting Text Insider Tips for Working with Fonts in Storyline 360 How to Use Typography to Improve Your E-Learning Storyline 360: Working with Theme Fonts Follow us on Twitter and come back to E-Learning Heroes regularly for more helpful advice on everything related to e-learning. If you have any questions, please share them in the comments.2.6KViews0likes0CommentsSnag That E-Learning Job with These 5 Interview Tips
If you’re reading this article, you probably landed a job interview for an e-learning role. If so, congratulations! And if you haven’t yet, kudos for thinking one step ahead. Interviews are an opportunity for you and a potential employer to find out if the position, company values, and culture are a good fit. Whether your interview is over the phone, through Zoom, or in person, there are a few things you can do to mentally prepare for the incoming questions. Let’s take a look! 1. Plan Ahead It’s natural to feel anxious about an interview, but it’s best to avoid carrying those nerves into the meeting if you want to make a good first impression. Giving yourself enough time to prepare will help you build the necessary confidence to present yourself professionally and show the potential employer you’re the right person for the job. Here are two ways to make that happen: Schedule time to prepare. Set aside time to practice and pull together everything you need for the interview (which we’ll cover in this article). Don’t procrastinate—mark this time on your calendar and treat it like a meeting. Schedule downtime before your interview. Racing to an interview is a recipe for nerves—which can cause you to come across as anxious and jittery. Put your best impression forward by giving yourself time. Taking a 15-minute break beforehand allows you to collect your thoughts so you feel relaxed and ready to go. 2. Review the Job Description You read the job description before applying, but have you looked at it since then? Reading through it again before your interview ensures that the details are fresh in your mind. This will help you highlight your most relevant skills and experience—increasing your chances of getting hired. 3. Do Your Research Find out as much as you can about the company. Look at their website, read articles about them, and browse their social media channels. Also, read customer reviews as well as testimonials from current and former employees. Try to answer questions like: What’s the company’s mission? What are their values? What makes them unique? Who are their competitors? The more you know about the company, the easier it’ll be to answer their questions and think up relevant ones of your own—which brings us to the final two tips. 4. Practice Answering Questions One of the best ways to prepare for a job interview is to look up common e-learning interview questions and practice responding. Some of those questions might include: Can you tell me about yourself? Why do you want to work here? Why should we hire you? Have you ever disagreed with a subject matter expert? If so, how did you resolve it? Practice answering these questions out loud. It might feel uncomfortable, but the more you practice, the better prepared you’ll be when it’s time for the real interview. If you’re interviewing in person or on Zoom, consider recording a video of yourself practicing. It might feel awkward at first, but the footage will offer helpful insights. As you replay the recordings, ask yourself: Are you sitting up straight? Are you speaking clearly? Is your tone friendly and inviting? What is your body language communicating? How’s your eye contact? You may have an idea of what you sound like, but actually seeing and hearing a recording of yourself can help you take a step back and imagine how you come across to others. Want to start practicing now? Then download and customize this question and answer template. 5. Prepare Questions of Your Own Usually, at the end of an interview, the employer will ask if you have any questions. Asking thoughtful questions shows you’ve done your research and that you’re genuinely interested in the organization. It’s also an opportunity to learn more about the company and the role—and decide if it’s a good fit. Preparing questions beforehand will ensure you get all the information you need to make a decision if the company extends an offer. Not sure which questions to ask? Take a look at this list: What Questions Do You Ask Prospective Employers? Wrap-Up By following these tips, you’ll gain the confidence to nail your next e-learning job interview and show a potential employer that you’re the ideal person for the job. Looking for more tips on how to land your dream job? Check out these helpful resources: 5 Tips for Landing Your Next E-Learning Job 7 Common E-Learning Job Interview Questions Boost Your E-Learning Career by Building Your Personal Brand 5 Things to Include in Your E-Learning Portfolio We’d also love to hear from you! What advice do you have that has helped you prepare for an e-learning job interview? Please share in the comments below. Follow us on Twitter and come back to E-Learning Heroes regularly for more helpful advice on everything related to e-learning. If you have any questions, please share them in the comments.226Views0likes0CommentsVirtual Classroom
A virtual classroom is a digital environment where an online class, workshop, or webinar takes place. Virtual classroom platforms feature audio, video, and screen sharing so facilitators can connect with learners, share slides or content, lead discussions, and demonstrate skills. They may also include breakout rooms, polls, quizzes, chat bars, Q&A panels, and additional interactive features. Learn more: 7 Ways to Make Your Webinars More Interactive175Views0likes0CommentsLearning Styles
An umbrella term covering a range of theories, learning styles refers to the idea that each person learns best in a particular way—for example, by looking at visuals, listening to audio, etc. According to this theory, by identifying someone’s style and accommodating for it, you can make learning new information or skills easier. Unfortunately, this popular concept has not held up when studied. While people might have personal preferences about what format they most enjoy learning from, designing learning around those preferences doesn’t improve results. A more effective approach is to adapt your learning experience to what works best for the content you’re conveying. Learn more: Learning Styles: Myth or Fact? Evidence-Based Guidelines for E-Learning158Views0likes0CommentsBlended Learning
Blended learning is when you use more than one method to deliver training and support to learners, such as combining face-to-face classroom training with e-learning. Learn More: A Quick Primer on Blended Learning 4 Fresh Ideas for Using E-Learning in Your Blended Learning Strategy When Is Blended Learning the Right Strategy?197Views0likes0CommentsCreate a Cohesive Look with These 5 Storyline 360 Visual Design Pointers
Creating a cohesive visual design throughout your course is something e-learning pros spend a lot of time perfecting. Here are a few ways I ensure visual design consistency right from the start! 1. Create custom theme colors to ensure consistency Before adding content to your slides, create a new theme color. Using theme colors ensures consistency across slides and makes it quick to change the colors throughout a project or template. Go to the Design tab Click the Colors drop-down arrow Select Create New Theme Colors Use the color selectors to assemble your palette Enter a name for your custom theme colors Click Save Pro tip: Use the Eyedropper tool to select any color visible on your screen. For more info, check out this article: Storyline 360: Working with Theme Colors. 2. Create new theme fonts to save design time Avoid editing the fonts on every slide by creating a new theme font for each of your projects at the start. Theme fonts control headings, body text, questions, and answer choices. Go to the Design tab Click the Fonts drop-down arrow Select Create New Theme Fonts Choose a heading font and a body font Enter a name for your custom theme fonts Click Save For more info, check out this article: Storyline 360: Working with Theme Fonts. 3. Use slide masters to create uniformity across slides No need to copy and paste similar items from one slide to another. Apply the same look and feel across multiple slides easily using slide masters. Go to the View tab Click Slide Master Customize the slide master and layouts Pro tip: If you have a quiz in your course, you can also customize the feedback masters to give your question feedback layers a consistent look and feel throughout your course. For more info, check out this article: Storyline 360: Using Slide Masters. 4. Edit assets in third-party apps and save changes directly into your project With the Media Library, you can edit project assets in a third-party app—like Photoshop—and save the updates to Storyline 360 without having to export and reimport the image. Right-click the image you want to edit Scroll to Show in Media Library Click the pencil icon to edit Choose an app from the list of image editors installed on your computer Edit the image Save your changes and close the app For more info, check out: Editing Assets in Third-Party Apps. 5. See what the layout will look like by quickly adding placeholder text When you’re designing slide layouts, it can be helpful to add placeholder text to get a feel for what they’ll look like once you add your content. With Storyline 360, you don’t have to go to the web to search for lorem ipsum text to copy and paste. You can save time by using this shortcut right on your slide. Insert a textbox on your slide Type =lorem() Hit Enter on your keyboard Pro tip: If you want a certain number of placeholder paragraphs, enter that number in the parentheses. For example: =lorem(3) displays 3 paragraphs. More Ways to Save Time These are just a few of my favorite visual design workflow tips. There is so much more you can do in Storyline 360. Want to save even more time? Then check out my other time-saving articles: Set Yourself Up for Success with These 5 Storyline 360 Project Time-Savers Crush Your To-Do List with These 6 Storyline 360 Slide-Building Tips I’d love to hear all the different tips and tricks you use to save time. Please share your ideas below. Want to try something you learned here, but don’t have Articulate 360? Start a free 30-day trial, and come back to E-Learning Heroes regularly for more helpful advice on everything related to e-learning. If you have any questions, please share them in the comments.811Views0likes0CommentsSet Yourself Up for Success with These 5 Storyline 360 Project Time-Savers
When it comes to building e-learning, I’m always on the lookout for more ways to save time. In addition to these slide-building and visual design tips, I compiled this list of project-level time-savers to help you work even faster while also giving you peace of mind. 1. Access your recent projects quickly by opening them from your taskbar Instead of clicking through numerous folders to open a project you’ve recently been working on, save time by opening your project right from the taskbar. Right-click the Articulate Storyline 360 app in your taskbar Select the project you want to open in the Recent list Pro tip: You can also drag and drop a .story file to the Storyline 360 app in the taskbar to automatically pin your project for quick access. 2. Create a safety net by changing project AutoRecovery settings Set how often you want to recover your work in case you experience a power outage or the app shuts down unexpectedly. Click File Click Storyline Options Select AutoRecovery checkbox Adjust how often Storyline saves Click OK For more info, check out this article: Storyline 360: Setting Storyline Options 3. Personalize your AutoCorrect options so you don’t have to think twice about misspelling Choose which misspellings Storyline 360 will automatically fix for you. You can also edit phrases or company names you’ll use often by adding the abbreviated text and then having Storyline 360 automate the longer version (e.g., replace ‘arti’ with ‘Articulate’). Click File Click Storyline Options Click AutoCorrect Options Edit, add, or remove words Click OK For more info, check out this article: Storyline 360: Setting Storyline Options 4. Replace specific text with another word or phrase all at once If a word or name you used throughout a project changes, no need to dig through each slide searching for it. You can easily find text to replace a specific word or phrase in any of your projects. Go to the Home tab Click the drop-down arrow next to Find/Replace Choose Find Text Click Replace In the Find What field, enter the text you want to replace In the Replace With field, enter the new text you want to use instead For more info, check out this article: Storyline 360: Finding and Replacing Text 5. Create a seamless look by hiding the player controls in one click If you added your own custom navigation features, then you don’t need to uncheck every menu and control option to turn off the player features. You can hide the modern player controls in just a few clicks. Go to the Home tab Click Player Scroll to Button Set Set the Menu & Controls option to Off For more info, check out this article: Storyline 360: Hiding the Player Frame for a Chromeless Design More Ways to Save Time These are just a few of my favorite project-level time-savers. There is so much more you can do in Storyline 360. Want to save even more time? Then check out my other time-saving articles: Crush Your To-Do List with These 6 Storyline 360 Slide-Building Tips Create a Cohesive Look with These 5 Storyline 360 Visual Design Pointers I’d love to hear all the different tips and tricks you use to save time. Please share your ideas below. Want to try something you learned here, but don’t have Articulate 360? Start a free 30-day trial, and come back to E-Learning Heroes regularly for more helpful advice on everything related to e-learning. If you have any questions, please share them in the comments.314Views0likes0Comments3 Reasons to Use Content Library 360 in Rise 360
I’m always on the lookout for tips to help me create effective courses quickly. If you’ve ever used Rise 360, then you can appreciate how easy it is to build beautiful, interactive courses fast. One of my favorite things about Rise 360 is that I have access to Content Library 360 from within the app. Content Library 360 is chock-full of assets that can save you money, speed up your workflow, and make your content relatable. Let me explain how. 1. Save Money Have you ever worked on a project with little to no images to go along with the content? It happens more often than you’d think! Often, companies just don’t have the budget or resources to create custom imagery. And in the past, if you didn’t have hours to spend scouring multiple free image stock sites, you were left with one option: paid stock photo sites. But paid stock sites can be super-expensive, especially if you need a bunch of images. That’s why I love Content Library 360. If you have an Articulate 360 subscription, you automatically have access to Content Library 360. That means—for no added cost—you can use as many images as you want from our ever-expanding library of literally millions of assets. These assets are made available through third parties, including Unsplash, Noun Project, Pexels, and Pixabay, and you can use them in your content without additional charge. However, as noted in our Terms of Service, use of these images, including any attribution requirements, is subject to these third parties’ terms. 2. Save Time Another great reason to use Content Library 360 is to speed up course creation. That’s because you can search our ever-growing, massive library of course assets and insert them into your project in just a few clicks—without ever leaving Rise 360. No more leaving the app, opening up your search engine, and navigating to an image stock site to try to find what you’re looking for. With Content Library 360, you can find the images you need right in the app—and without interrupting your workflow. And once you’ve found the perfect image for your project, you can use the Crop Image feature to save even more time! In just a few seconds, you can crop any image to fit your needs. There’s even a “Constrain to Square” option. Best of all, the cropping feature works with both Content Library 360 images and images you upload! Want to see other useful ways to use this feature? Check out this article. 3. Create More Relatable Scenarios Scenarios are a great way to engage learners and help them navigate real-life situations. However, it can be a challenge to find all the assets you need with so many possible outcomes. Crafting realistic learning experiences with the scenario block in Rise 360 makes all this possible. And with Content Library 360, you not only have access to millions of stock images, you also have thousands of combinations of photographic characters and poses to choose from so you can easily create your own branching scenarios in a snap. As you build your scenario, you can select backgrounds and characters from a variety of industries and professions to make it feel relatable. And because Content Library 360 images and characters are available right in Rise 360, it’s quick and convenient. Summary With Content Library 360 images built right into Rise 360, you save money, time, and hassle—all while creating more relatable courses. What’s not to love? For more Rise 360 and Content Library 360 tips and tricks, check out these articles: Rise 360: Adding Content Library 360 Images to a Course How to Find the Images You Want in Content Library 360 3 Ways to Use the Image-Cropping Feature in Rise 360 7 Creative Ways to Use Images in Rise 360 Courses Rise 360: How to Use Scenario Blocks 6 Rise 360 Blocks to Use Instead of Bullet Points What productivity tips do you have for creating courses in Rise 360? Please share your ideas in the comments below. I’d love to hear them! Want to save time by creating a Rise 360 course, but don’t have Articulate 360? Start a free 30-day trial, and come back to E-Learning Heroes regularly for more helpful advice on everything related to e-learning.302Views0likes1Comment