articulate 360
165 Topics5 Mental Health Resources You Can Share With Your Learners Today
Did you know that May is Mental Health Awareness Month? Individuals aren’t the only ones impacted by mental health challenges—businesses can feel the effects, too. Polling from Gallup indicates that employees with mental health challenges miss four times more work than those who rate their mental health positively. This lost productivity costs the economy some $47.6 billion annually. As an e-learning designer, you can help employees feel supported by providing resources that raise awareness of the importance of mental health and outline helpful tips for improving it. If you’re an Articulate 360 subscriber or trialer, you can get the ball rolling quickly by using the ready-to-use mental health training materials in Rise 360—just in time for Mental Health Awareness Month. Curious what’s available? Check out some of the new releases below. You can learn how to customize these templates for your own company and training needs at the end of this article. 1. Stress Busters Microlearning Course Encourage employees to feel more relaxed with the 9 Simple Stress Busters You Can Do Today microlearning course. Moving through this quick learning exercise reveals proven strategies for relieving stress and activating feel-good endorphins. 2. Breathing Exercises Microlearning Course Anyone feeling tense can benefit from the Melt Away Stress With a 3-Minute Breathing Exercise microlearning course. With each successive swipe through a guided breathing exercise and accompanying graphics, learners will feel more peaceful and serene. 3. Feel Your Feelings Microlearning Course Reinforce the message that it’s OK not to be OK with the Feel Your Feelings microlearning course. This quick activity helps people process difficult emotions by prompting them to name and explore their feelings from a place of compassion and understanding. 4. Get Grounded Microlearning Course Support employees through worry spirals and mental fog with the Escape Anxiety With a 5-Minute Grounding Practice microlearning course. Moving through this 5-minute practice roots learners in the here and now as they engage their senses of taste, touch, smell, sight, and hearing. 5. Day-by-Day Challenge Course To offer access to a more in-depth daily challenge, check out the 5-Day Challenge To Improve Mental Health course. Each day, learners can refer to this course, explore a different facet of mental health, and follow simple exercises for putting concepts into practice. Wrap-Up Providing mental health resources as part of your business training is a win-win. Employees have access to support at work, and businesses benefit from employees who are less stressed and anxious. The examples above can help you get started, but the sky’s the limit for how you can use Articulate’s creator tools to achieve your business training objectives. Interested in sharing one of the supportive resources with your team? If you’re an Articulate 360 subscriber or trialer, you can access and edit all the examples linked throughout this post directly from your Rise 360 dashboard. Simply click Create New, choose Microlearning and select the template you want to use, as shown in the video below: Looking for even more ready-to-use, customizable mental health content? You'll find those in your Rise 360 dashboard too. Just click Create New, choose Course, and then select Mix & Match Lessons. Here are some relevant topic categories to check out: Stress Management: covers stress management fundamentals, stress and work performance, and strategies to relieve stress. Health and Wellness: includes dealing with difficult emotions and life events, exercise, forming healthy habits, mental health awareness in the workplace, positive psychology fundamentals, and positive psychology in the workplace. Resilience: features content on resilience fundamentals, building career resilience, leadership and resilience, emotional and physical resilience, and thriving through challenges. Be sure to also follow us on Twitter and LinkedIn and come back to E-Learning Heroes for more advice on everything related to e-learning. If you have any questions, please share them in the comments.1KViews0likes9CommentsYour One-Stop Shop for Storyline 360 Quiz-Building Tips
If there’s one thing most e-learning courses have in common, it’s that they have a quiz. Whether there are knowledge checks peppered throughout or an evaluation at the end, it’s rare to see a course without a quiz question or two. We’ve rounded up our most helpful quiz-related content on E-Learning Heroes so you can easily get up to speed on creating quizzes in Storyline 360, as well as learn more about designing effective quizzes. And how about getting off to a running start with some free downloads? Tutorials If you’re new to creating quizzes in Storyline, first things first! Start by taking a look at these helpful tutorials: Creating Quizzes with Form-Based Questions Creating Quizzes with Freeform Interactions Adding Quiz Result Slides Instructional Design Tips Once you’ve got the technical side of things down, check out these articles for tips on designing meaningful quizzes: How to Write Good E-Learning Quiz Questions Do’s and Don’ts of Writing Effective Multiple Choice Questions 20+ Tips for Writing Great Quiz Questions and Response Options 6 Common Quizzing Mistakes and How to Avoid Them How to Quiz Your Learners at the Right Time How to Write Effective Quiz Feedback How to Match Question Types with the Skills You’re Testing Creating Quizzes: Choose a Passing Score How to Write Plausible Incorrect Answer Options for Quiz Questions Downloads Whether you’re short on time or just looking for inspiration, these downloads are just the thing: Countdown Quiz Game Movie Trivia Game Question Bank Template Italian Drag and Drop Quiz Multiple Choice Quiz with Badge Awards Color Gradient Quiz Process Interaction Quiz Combination Lock Quiz Dog-Themed Jeopardy Template Wrap-Up These tutorials, articles, and downloads should be more than enough to get you ready to build your next quiz. But if you get stuck somewhere along the way, we’re always here to help! Feel free to reach out to us in the discussion forums with any technical- or design-related questions you may have. Did you find these resources helpful? Subscribe to our newsletter to get the latest e-learning inspiration and insights directly in your inbox. You can also find us on LinkedIn and X (Formerly Twitter).1.9KViews0likes5CommentsHow to Add a Timer to Your Storyline 360 Quiz
Sometimes it makes sense to limit the amount of time learners have to complete a quiz or survey. Perhaps you’re assessing time-critical tasks, or you want to create a sense of urgency similar to what they might experience on the job. In these cases and many more, a time limit can help keep learners accountable and ensure they complete an e-learning quiz or survey in a controlled amount of time. If you decide to add a timer, the good news is that it’s easy to add a time limit to your Storyline 360 projects. Let’s take a look! Step 1: Insert a Results slide The first thing you need to do is insert a Results slide into your project. Once you’ve added a Results slide, go to that slide, click the Design tab at the top, and then select Quiz Settings. Step 2: Add a time limit In the Quiz Settings window, look for the Quiz Timer. Select the checkbox and enter the total number of minutes you want to allow for the quiz. Step 3: Select Your Preferences Next, select the clock drop-down arrow and choose your preferences for starting and displaying the timer. Keep in mind, if you select Do Not Show Time, the timer will still function, it just won’t be visible to the learner. When you’re happy with your selection, click OK to close the Quiz Settings window. That’s all there is to it! When you publish your project, you’ll see the timer in the top right corner of the course player. What happens when time runs out? If a learner doesn’t finish the quiz in time, they’ll get a message telling them they’ve exceeded the time limit. Once they click OK, they’ll automatically be directed to the Results slide. Any unanswered questions will be marked Incorrect. Things to Consider Whenever you include a quiz timer, it’s only fair to prepare your learners. Add clear instructions so they know how the quiz will work and how much time they have to finish it. Keep in mind that while timers may be an effective motivational tool for some learners, for others they can cause stress and get in the way of learning. To be inclusive of all learners, it's a good idea to give them the possibility to opt-out. Summary Adding a timer to your Storyline course is super easy and can enhance the learning experience. Using a timer to assess time-critical tasks or to create a sense of urgency are just a few ways to use time in e-learning. Looking for some more quizzing tips and tricks? Check out these articles: How to Write Good E-Learning Quiz Questions Improve Your Quizzes with These Do’s And Don’ts How to Write Plausible Incorrect Answer Options for Quiz Questions What ways have you used a timer in your e-learning projects? Leave a comment and share your experience! Want to try something you learned here, but don’t have Articulate 360? Start a free 30-day trial, and come back to E-Learning Heroes regularly for more helpful advice on everything related to e-learning.4KViews0likes27CommentsEverything You Need to Know About Image Usage Rights
It’s tricky to find appropriate, usable images for e-learning projects. And sometimes after you’ve found the right photo, it’s unclear whether you can legally use it. Images are protected by copyright. So you can’t add any photo you find online to your e-learning project. But trying to do the right thing can raise more questions than answers: What if I just link to their website? Should I reach out to this person? Wait, I don’t see who owns this image! Usually images you’ll find on photo sites fall into one of a few categories. Here are some of the different usage terms you’ll find. Copyright Copyright law protects original works, including images. In most cases, you can’t copy or distribute a copyrighted image without permission from the person who created it. You should assume that any image you find online is protected by copyright. If possible, contact the copyright holder for permission to use their work. When you buy a stock photo, you’re buying the right to use that copyrighted image. Depending on which site you use, the image may be royalty-free or rights-managed. Royalty-free means that you’re not responsible for royalty payments. You’re usually able to use the image as you’d like. Rights-managed means there are restrictions on how you can use the image—so be sure to read your license agreement closely! Fair Use The fair use doctrine provides opportunities for using copyrighted images without permission. For instance, you can legally use a copyrighted image for personal and educational use, or for the public good. Most e-learning is commercial. As a course creator, you should assume that using copyrighted images in your work doesn’t qualify as fair use. But fair use also allows you to transform copyrighted images into something new. If you turn a copyrighted image into a completely new work, you can use that image freely. Creative Commons The Creative Commons non-profit provides free copyright licenses for creators. The copyright holder can determine several things with these licenses: Whether you need to credit them for their image Whether you can use their image for commercial purposes Whether you can modify their image What license you must use if you modify their image When using Creative Commons images, be sure to read the license carefully and use the image appropriately. Pro tip: Some photo sharing sites, such as Flickr, allow you to filter search results by specific Creative Commons licenses. Public Domain Typically an image becomes part of the public domain in one of two ways. The creator either gives up copyright willingly, or the copyright expires. These images aren’t protected by copyright, so you’re free to use them any way you’d like. Pro tip: WikiMedia Commons has a large database of images in the public domain. A Helpful Alternative Of course, the easiest way to source freely available images is by finding e-learning solutions that provide stock assets. Articulate 360 includes Content Library 360, an ever-growing library of visual assets that you can access right from within Rise and Storyline 360. These assets are made available through third parties, including Unsplash, Noun Project, Pexels, and Pixabay, and you can use them in your content without additional charge. However, as noted in our Terms of Service, the use of these images, including any attribution requirements, is subject to these third parties’ terms. See what’s available in Content Library 360 when you start a free, 30-day trial of Articulate 360. You’ll also get access to award-winning authoring apps Storyline 360 and Rise, a project review app, and access to live online training led by industry experts. New to e-learning? Sign up for our E-Learning 101 email course, a series of expertly-curated articles that'll get you up to speed with course development.3.5KViews1like32CommentsThe Difference between Screencasts and Software Simulations
If you’re new to creating software training—and even if you’re not!—you might use the terms screencast and software simulation interchangeably. But did you know they’re actually two different things? It can be easy to get these terms confused, so let’s walk through the nuances that differentiate these two methods and explore the use cases for each. Screencasts Screencasts are videos that show a recording of your computer screen. They’re often used to demonstrate the use of an application or software. They include all of your mouse movements and typically have audio narration that gives learners more contextual information about the process they’re seeing—such as the names of various software features or steps. Because screencasts are simply videos, they’re not interactive. When to use a screencast Screencasts are great for creating simple “how-to” videos. This kind of visual walkthrough is beneficial when you’re trying to explain a process that’s too complicated to explain with written text alone. And if the process isn’t something learners will be doing frequently, screencasts can be a helpful performance support resource that learners can easily reference in the future. How to create a screencast If you have Articulate 360, you already have access to not just one but TWO apps that are specifically designed for screencasts: Peek 360 and Replay 360. Learn more about when to use each app in this article: How to Decide Which Articulate 360 App to Use for Screen Recording. Want to see an example? Watch the “How to Add Comments in Review 360” screencast I created with Peek 360 below. This screencast provides a short overview of how to provide feedback on courses in the Review 360 web application. It’s perfect for an audience who may be comfortable with web-based technology and already have familiarity with Review 360. The screencast focuses on a simple process. It’s clear, concise, and to the point. So, how does a software simulation differ? Well, I’m glad you asked. Software Simulations While you also have to record your screen to create a software simulation, the major difference is that instead of simply showing the learners what to do, you give them the opportunity to try it out for themselves. They’re called simulations because you simulate the software’s interface by recording it and turning that recording into an interactive practice environment for learners. They can go through and click on all the buttons—like you did when you recorded it. It’s almost as if they’re using the software themselves. The advantage of doing it this way—versus simply having them use the actual software—is that you can build in on-screen explanations and feedback to guide them as they practice. Software simulations are usually the go-to for creating software training because they provide learners with a risk-free environment to help them learn a new app or process. Another thing that sets simulations apart from screencasts is that you can test your learners’ understanding by creating a simulation that’s graded. For every click in the right spot, learners can earn points. And for clicks in the wrong spots, points can be taken away. It’s a great way to ensure learners have understood how to complete specific processes within an app or software. When to use a software simulation Interactive software simulations are ideal when you want learners to physically practice using the software themselves—including entering data, interacting with drop-down menus, and identifying multiple steps in a more complex process. Software simulations give learners an opportunity to practice using the proper click-path of a specific process or software without fear of impacting the actual production environment or ruining any real-life data. With software simulations, you can put your learners in the driver’s seat so they can deepen their knowledge of a process, gain experience, and build confidence in using an app or piece of software. How to create a software simulation Articulate 360 subscribers can use Storyline 360 to create software simulations quickly and easily. Want to learn how? Here’s a tutorial that’ll help you get started: Creating Software Simulations in Storyline 360. Want to see an example? Explore the software simulation created with Storyline 360 below. In this example, users learn how to get started using the Review 360 web application. This simulation walks through four basic steps that you need to know how to do if you’ll be using Review 360. You’ll notice that because learners actually click through the software themselves, they must pay closer attention to each step in the process. This simulation is perfect for an audience who might not be as familiar with web-based technology or for users who are brand new to navigating Review 360. With simulations, learners can confidently navigate a new application because they’re practicing in the safety of a learning environment. View example More Resources Now you’re well on your way to identifying the nuances between screencasts and software simulations and you should be able to use these terms confidently when tackling your next project! To help you keep everything straight, I’ve outlined the differences in the handy table below. Screencasts Software Simulations Use case Demonstrate a simple, straightforward process. Train learners on a complex process through interactive practice and/or assessment opportunities. Interactive No Yes On-Screen Hints & Feedback No Yes Looking for more best practices around creating screencasts and software simulations? Check out these resources! And let us know in the comments what screencasts and software simulations you’ll be creating next. Follow This Process to Create Software Simulations and Systems Training Like a Pro 3 Methods for Recording Screencasts 4 Tips on Creating Software Tutorials in Rise 360 Tips for Using the Storyline 360 Screen Recorder Like a Pro Follow us on Twitter and come back to E-Learning Heroes regularly for more helpful advice on everything related to e-learning. If you have any questions, please share them in the comments.1.5KViews0likes6CommentsHow to Copy Blocks from One Lesson to Another in Rise 360
Have you ever built a course in Rise 360 and realized, later on, that some of the content in one lesson would work great in a different lesson? Or maybe you want to reuse the same content structure? I’ve been there! Luckily, it’s super easy to copy blocks from one Rise lesson to another, thanks to the blocks template feature. Here’s how it works. 1. Open the Blocks Library The first thing you’ll want to do is navigate to the lesson that contains the block you want to copy and open up the block library. You can do that either by clicking the plus sign (+) between two blocks … … or by clicking All Blocks in the blocks shortcut bar. 2. Create a New Template Next, select the templates tab in the block library and click the New Template button. 3. Select the Blocks to Copy Then, select the block or blocks you want to copy by clicking the checkmark for each one. 4. Save Your Template Next, click Save, name your template, and click Save once again. 5. Insert Your Template Finally, navigate to the lesson where you’d like your copied block to go, open up the blocks library, and select your template. Wrap-Up Et voilà! It’s that easy. With blocks templates, you can copy blocks from one lesson to another within the same course and copy blocks to lessons in other courses; you can even share your blocks with members of your team if you have an Articulate 360 Teams subscription. It’s super handy! Want to try block templates out, but don’t have Rise 360? Start a free 30-day trial of Articulate 360. And subscribe to our newsletter to get the latest e-learning inspiration and insights directly in your inbox. You can also find us on LinkedIn and X (Formerly Twitter).8.9KViews4likes32CommentsHow to Decide Which Articulate 360 App to Use for Screen Recording
We're ending support for Studio 360, Replay 360, and Peek 360 on December 31, 2026. Learn more. Since software training is one of the most common types of e-learning, it’s no surprise that Articulate 360 includes not one, not two, but three apps with screen recording features. Each of these apps has a unique feature set and is specifically designed for a different purpose. If you’re wondering which app to use for your project, you’re in the right place! Keep reading to learn more about how screen recording differs in Peek 360, Replay 360, and Storyline 360 and the types of projects best suited for each. Peek 360 Peek 360 is a lightweight app that works natively on both Macs and PCs and lives in your menu bar or system tray, so it’s always just a click away. Once you’ve recorded your screen, it automatically uploads to Review 360, generating a shareable link. You can also download the .MP4 file and insert the video into your Rise 360 or Storyline 360 courses or export it for LMS to use it as a stand-alone asset. Since Peek 360 doesn’t have editing capabilities, it’s best for recording short screencasts to share with team members on the fly or to insert into your courses as is. Check out our tutorials and user guide for more details on how to create and distribute screencasts with Peek 360. Replay 360 If you’re looking to create a longer screencast that could require some editing, Replay 360 might be a better choice. In addition to some lightweight editing options, this Windows-compatible desktop app allows you to record your screen and your webcam simultaneously, creating a cool picture-in-picture effect. You can also insert images, video clips, and lower thirds, making it easy to create a polished tutorial video that you can use on its own or insert into your Rise 360 or Storyline 360 course. For more information on Replay 360, check out our tutorials and user guide. Storyline 360 Storyline 360 also allows you to record your screen, but unlike Peek 360 and Replay 360, that’s not its sole purpose. Storyline 360 is a full-fledged authoring app that not only lets you record screencasts and build software simulations but also lets you add custom interactions, quizzes, and much more. This makes Storyline 360 the ideal choice when you want your software training to be interactive. It’s also a great option if you want to overlay text or objects—like arrows or highlight zones—on top of your video. Storyline 360 has some editing capabilities, allowing you to make adjustments to your recording after the fact. You can also easily add subtitles to your screencast—and your entire course—directly in Storyline 360, which is great for accessibility. When you’re done, you can publish to video, web, or LMS. If you want to take a closer look at the screen recording feature in Storyline 360, check out this tutorial or head on over to the user guide. The Bottom Line Peek 360, Replay 360, and Storyline 360 are all great options for recording your screen. Which app you use depends on your project requirements. If you need to record a screencast super-fast, Peek 360 is the way to go. When you want to edit your screencast or record your webcam along with it, go with Replay 360. And when you want to create an interactive software simulation, overlay additional content, or add subtitles to your screen recording, opt for Storyline 360. To make it super-easy to compare the feature-sets of the different apps, I pulled together this quick-reference guide: Peek 360 Replay 360 Storyline 360 Work natively on Macs X Work natively on PCs X X X Record screen X X X Record mic audio X X X Record webcam X X* Edit recording X X Add interactivity X Add closed captions X Publish to video (.MP4) X X X Publish for LMS X** X** X Publish to Review 360 X X X Once you’ve decided which app to use, you might be wondering how to start building your software training. Here’s an article that’ll help you get off on the right foot: Follow This Process to Create Software Simulations and Systems Training Like a Pro. Want to try out these apps, but don’t have Articulate 360? Start a free 30-day trial. And subscribe to our newsletter to get the latest product updates, e-learning examples, and expert advice directly in your inbox. *Webcam recording must be done separately from screen recording **Publish FoR LMS via Review 3601.7KViews0likes2Comments5 Reasons It’s Easy to Record Screencasts with Peek
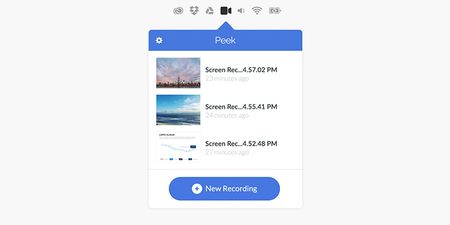
We're ending support for Studio 360, Replay 360, and Peek 360 on December 31, 2026. Learn more. Adding screencasts to your e-learning course is a great way to show people how to do something instead of just telling them. You can use screencasts in your e-learning courses, but also to simplify other aspects of your work. Here are just a few examples of use cases: Train internal staff on a new tool or process. Explain something to an external contractor or client. Demonstrate a complex issue that comes up during the course review process. I love that with Peek I now have an easy way to record screencasts from my Mac or my PC. What makes it so easy? Let’s have a look. 1. Access Peek Easily via the Menu Bar One of the things I love about Peek is that it’s always just a click away. It lives in the menu bar on your Mac or in the systems tray on your PC, so it’s always available when you need it. 2. Easily Select the Recording Zone When you record a screencast with Peek, all you have to do is select the application on your computer that you’d like to record. Peek then automatically selects that area of the screen. Of course, you can always resize the recording frame if you’d like to include multiple applications. Just drag the corners of the frame with your mouse. 3. Record Audio and Video Simultaneously With Peek, you can also record narration at the same time you’re recording any on-screen actions using your computer’s mic. That way, you don’t have to sync the audio with the video! 4. Share Your Screencasts in One Click Once you’ve recorded your screen and narration, you can upload it to Articulate 360 with just one click. Peek will automatically copy the URL to your clipboard so you can easily share it however you’d like! Once you’ve uploaded your video to Articulate 360, you can also easily collect in-context feedback from stakeholders with Articulate Review, add it to a course, or create a SCORM-compliant package for your learning management system. 5. Access All Recordings in an Instant Another great thing about Peek is that all your previous recordings are saved in the Peek app. You can easily go back to the app to grab the links to those recordings, as needed. More Resources With Peek, creating great screencasts is quicker and easier than ever, giving you back time in your day to focus on the course design—instead of fussing with over-complicated tools. To learn more about using Peek, check out this overview and this Getting Started with Peek tutorial.192Views0likes0CommentsBring Courses to Life with Characters from Content Library 360
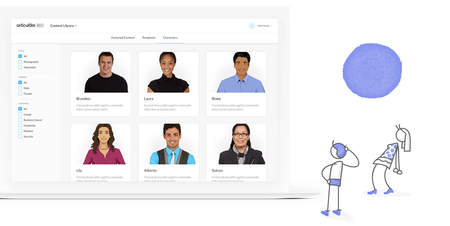
Characters are one of the most commonly used elements of e-learning courses. Whether you’re trying to craft a meaningful narrative or make your content more relatable for learners, characters are a great way to bring your content to life. Luckily, thanks to Content Library 360, you have a diverse assortment of 100+ illustrated and photographic characters at your fingertips. Choose from 100,000+ combinations of characters, expressions, and poses. With a wide range of industries and professions to choose from, you’ll have endless ways to show learners how your content applies to them. And with Content Library 360 integrated into Articulate 360, you can bring a sense of personality to your courses without slowing down your workflow! Let’s take a look at the characters available in Content Library 360: Photographic Illustrated — Modern Characters Illustrated — Classic Characters Photographic Characters Each character has 100+ poses. Thomas (3 outfits) Friendly and professional, Thomas fits any business setting. Sarah (3 outfits) Sarah is a cheerful choice for leading learners through a variety of topics. Aliyah (3 outfits) Choose Aliyah when you need a poised young professional who knows how to get the job done. Renita Renita’s dressed for success as a young professional or customer service rep. Craig Choose Craig to showcase safety protocols on your construction site. Robert Choose Robert when your training needs a friendly face. Amira Meet Amira, a polished woman who’s ideal for most business settings. Michele Select Michele to lead learners through safety and construction scenes. Liz Liz’s kind look is ideal for customer service, healthcare, and more. Glenn Choose Glenn when you want to add a polished executive to your course. DeShaun Deshaun’s a versatile young professional perfect for business settings. Shafer Outgoing and motivating, Shafer is perfect for most business settings. Joseph A charismatic coach or mentor for sports and health-related topics. Isabel A poised character to guide learners through courses on medicine and science. Bradley Bradley’s kind expressions make him an approachable guide for medical courses. Vicki A cheerful-looking call center employee who’s great for customer service courses. Antonio Antonio makes a perfect guide for international business courses. Maria Maria is a young, sharp-looking female EMT for medical courses. Kayla With all her gear on, Kayla is prepped for your safety courses. Mitchell Mitchell radiates the warmth and energy of a caring customer service pro. Lange Lange is the perfect energetic businessman for leadership courses. Mary Choose Mary to guide your learners through customer service training. Valeria An upbeat, young character with a casual look for a variety of courses. Andres Outfitted in an EMT uniform, Andres is ready to lead in medical courses. Carlos Provide learners with a relatable guide in casual workplace courses. Ginnie Friendly-looking older woman in colorful attire for challenging topics. Emily Emily is a laid-back character who’s perfect for many types of courses. Paulina Paulina is an energetic guide for learners in medical and dental fields. Gail A dynamic professional character for courses set in a modern workplace. William An authoritative, professional character for health and science courses. Shelia Sheila is a well-dressed young professional who radiates confidence. Nora This sporty middle-aged woman is the perfect coach for health courses. Jet Jet’s casual style and friendly face make him a versatile character. Gianna This stylish businesswoman is great for corporate training. Brandon The perfect casual character for a wide range of everyday scenarios. Alberto This cheerful man in workwear is great for office training courses. Quan This bright young man in workwear is perfect for industrial scenarios. Laura A great character for customer service courses. Includes headset shots. Atsumi This recognizable character’s fun expressions make her a fan favorite. Al A confident, gray-haired gentleman well-suited for leadership training. Caesar Let this affable doctor help learners make healthy choices. Tonya This cheerful character is perfect for health and wellness training. Nicky Nicky’s style and piercing looks make her a go-to manager character. Tony With his hard hat and safety goggles, Tony’s ready to work. Paula Use this woman in workwear for casual scenarios or industrial courses. Nerijus Nerijus has the look of a sharp young businessman on his way to the top. Marie Mature woman in professional attire is great for courses of any type. Lorraine Cheerful doctor in scrubs and lab coat ideal for health-conscious courses. Jonathan This older man in a headset works great in customer support courses. Javier This casual, older male character works well in any kind of course. James Customer service professional in workplace attire. Includes headset. Jake The perfect worker for industry courses. Includes safety hat and vest. Harriet This regal businesswoman in conservative garb is great for leadership training. Cort Cort is a male nurse character ready to help learners tackle health topics. Rosie Meet Rosie, a stylish young businesswoman for any type of course. Rhonda Encouraging, enthusiastic office worker for corporate training courses. Chris A mature businessman with a lot of personality for workplace courses. Paul Paul is a kind-looking man who’s great for customer service courses. Edwin Edwin is a casual character with kind expressions and a warm smile. Sonee Prim and proper, Sonee is a great seasoned character for workplace training. Jeremy Jeremy’s casual attire and laid-back attitude help him fit in anywhere. Christy Use this energetic businesswoman to give learners the inside scoop. Dave Playful and creative, Dave works well in any workplace course. Nicole Nicole’s gregarious vibe makes her a great character for sales courses. Christian Kind and sincere, Christian is a good pick for corporate training. Ron Approachable middle-aged professional perfect for workplace training. Anton This casual character is perfect for a wide variety of course topics. Andrea Cheerful female worker for industrial or construction site training. Brian A character whose warmth and charisma are great for workplace courses. Christine This serious blonde woman is a perfect partner for challenging courses. Ammon This affable chap can add friendliness and cheer to any type of course. Terri A middle-aged woman for customer service training. Includes headset. Alice A pleasant woman in office attire wearing a hard hat and safety goggles. Sukiyo A seasoned executive who’s perfect for scenarios in office settings. More coming soon! Illustrated — Modern Characters Each character has 300+ pose combinations. Liana Wearing an oversized blazer, Liana fits well in modern, professional settings. Alexis Dressed comfortably, Alexis is ready for casual and work-from-home scenarios. Simon Simon is a casual character ready for situations requiring an apron. Nadiya Dressed in professional attire, Nadiya is a great fit for business settings. Joshua Joshua stays safe with personal protective equipment and a high-visibility jacket. Haley Wearing a hard hat, vest, and work boots, ready for many industries. Sebastian A seasoned industry worker wearing personal protective equipment. Chloe Chloe is perfect for cafe, retail, or casual dining settings. Theresa Wearing nurses’ scrubs, Theresa fits right into medical settings. Shanae An approachable and memorable everyday guide. Wren A young, fashion-forward character suited for casual settings. Don A charming older man for any type of relaxed training. Mike An easygoing, self-assured guy perfect for relaxed settings. Eduardo An older gentleman, well suited for business-casual workplaces. Camila A casual, everyday guide ready to connect with a variety of learners. Jayla A cool, sophisticated friend or mentor, perfect for casual settings. Jamal At home in the business world, Jamal is distinguished but still fun. Jada A savvy and stylish guide who can connect with a broad audience. Eric A man with presence and panache who can connect with corporate crowds. Maya A busy young healthcare worker, well-suited for medical training. Pamela A mature businesswoman for corporate or finance training. Charles The epitome of a CEO, Charles is ready to lead in executive settings. Simone A reliable choice for helping learners navigate healthcare scenarios. Dante A versatile character for most business casual or academic settings. Lily Casual attire makes this character versatile. Includes built-in states. This sharp businessman is a great character for professional training. Shannon Modern businesswoman perfect for executive and leadership training. Amber A young doctor for health-related courses. Poses include a stethoscope. Blake A well-dressed character for any situation. Includes built-in states. Zachary Meticulous, middle-aged doctor for medical-themed training courses. Theo A mature professional who’s suited for more formal corporate training. Sylvie This businesswoman in sharp attire is perfect for professional courses. Sofie Use this casual and approachable middle-aged woman in your next course. Sophia Sophia is a modern and youthful character for any workplace course. Reuben This casual guy is a relatable ally for learners in any type of course. Phoebe Use this skilled nurse in hospital scenarios and workplace courses. Oliver This professional middle-aged man is dressed for any workplace scenario. Nathan This crisp gentleman in a gray suit is great for executive training. Matthew Gentleman in a black and gray business suit for professional training. Marcus Use this bespectacled doctor in health and wellness training courses. Madeline A sharply dressed doctor that’s great for health and wellness courses. Mabel Mabel is an older female surgeon with short hair and wireframe glasses. Lucas An easygoing middle-aged man in flattering business-casual attire. Juliet A redheaded woman in casual attire who’s suited for any kind of course. Stephen Use this charismatic businessman in a bold suit for executive training. Iris Young neighborly female character works for many different types of courses. Harrison Use this charming middle-aged doctor in health and wellness courses. Grace Use this calm and assured female doctor in health and wellness courses. Frank Middle-aged nurse with shiny dark hair perfect for hospital scenarios. Frances A youthful medical professional to use in health and wellness courses. Emma This brunette, middle-aged woman in workplace attire means business. Elisa This young woman is perfect for courses in casual environments. Demond A young nurse is here to help learners in health and wellness courses. Daniel Young, high-energy male perfect for any course in a casual setting. Claire Middle-aged woman for scenarios in casual locations, even the outdoors. Charlotte Fair-haired female professional perfect for workplace training courses. Arthur A striking doctor in business attire who’s great for wellness training. Alex A versatile character that’s calm, cool, and just a little outdoorsy. Abby This powerful corporate character is great for executive-level courses. Jonah This middle-aged man in jeans and a T-shirt is great for casual courses. Ethan An older, salt-and-pepper professional for any type of office training. Marilyn Marilyn’s casual attire and kind smile make her a relatable character. Lydia You can put this confident brunette in just about any type of course. Illustrated — Classic Characters Each character has 300+ pose combinations. Gabriel Molly Olivia Dennis Curt Norene Shane Bernardo Leonard Samantha Jennifer Louis Erik Kristina Beatrice Jayce Rose Roland Gloria Martin Maisie Jay Carmen Gregory Dominick Walt Evelyn Connie Peter Ivy Jason Adelaide Jessica Evangeline Debra Niles Cooper Hazel Bob Marissa In Summary With this ever-growing library of photographic and illustrated characters, it’s easier than ever to create personalized content that truly connects with your learners. Simply include them in a scenario in Rise 360 or add them to your slides in Storyline 360 to tell a story. The possibilities are endless! Looking for more ways to use characters in your courses? Check out these helpful resources to get inspired: 5 Tips to Help You Choose Characters for E-Learning 2 Quick Tips for Working with Characters in Storyline 360 5 Cool Ways to Use Characters to Engage and Connect with Learners Are you already using characters in your e-learning? Share your best practices in the comment below. Want to use these characters in your own e-learning courses, but don’t have Articulate 360? Start a free 30-day trial, and come back to E-Learning Heroes regularly for helpful advice on everything related to e-learning.2.2KViews0likes3Comments8 Business Use Cases for Microlearning
Are you excited to try out microlearning, but unsure when to use it? Below, we outline eight common workplace situations that benefit from a short-form course. Each situation includes a sample microlearning. At the end, learn how you can customize these templates for your own company and training needs. 1. Create Organizational Alignment To hit a business target, everyone needs to be moving in the same direction. Creating that alignment starts with clear, frequent communication of the shared mission, vision, and values. Microlearning can help. The following editable template shows how you can align employees through regular executive “micro” updates: Executive Update 2. Highlight HR Information, Notices, or Reminders Educating employees about annual events like open enrollment, tax season, and compliance training is a critical function of HR teams. The problem? Important announcements often get missed when they’re embedded in long paragraphs or endless emails. Grab the following templates to see how microlearning makes HR communications more digestible and engaging: A Quick Guide To Open Enrollment Internal Company Newsletter 3. Strengthen Company Culture and DEI Initiatives Fostering an inclusive company culture is a continuous process—not a one-time effort. A series of microlearnings can support your larger culture-building and DEI efforts. Check out the following examples for ideas on how to get started: Are You an Ally? Try Taking on These 5 Roles How To Identify and Stop Using Ableist Language Gossip-Proof Your Workplace 4. Streamline Business Processes You can also use microlearning to document and streamline business processes or workflows—such as employee onboarding or performance management. Notice how the following examples make it easy for employees to work through the steps of a process independently: New Hire Pre-Hire Checklist Performance Review and Feedback 5. Increase Security Awareness Most successful data breaches, phishing attacks, and other cybersecurity incidents are caused by human error. Adding refresher microlearnings throughout the year can fortify your defenses. See an example for safeguarding against phishing attacks below: Spot the Phish 6. Enhance Employee Wellness A successful business needs thriving employees. But employee wellness training often ends up buried under competing priorities. Microlearning makes it easy for employees to fit in short breaks for self-care throughout the workday. Check out these two wellness-related microlearning examples: 3 Desk Stretches to Instantly Improve Your Day 5 Tips for Better Naps 7. Provide Quick-Reference Guides Microlearning is the perfect resource for one-off training questions: Employees can quickly find the answers they need—when they need them. Below, we’ve created templates for product and software training. But you could easily create quick-reference guides for sales, customer service, and other teams. Get To Know [Name of Product] Software Training 8. Reinforce and Assess Key Takeaways Finally, who says you have to choose between a more sizable course and microlearning? Repetition aids retention. Consider following up longer training sessions with a microlearning quiz, scenario, or summary. The examples listed below demonstrate how you might do this: Can You Recover From a Workplace Mistake? Training Refresher Wrap-Up There’s no shortage of creative ways you can use microlearning to achieve your business training objectives. The examples above are just a starter list. You might also check out submissions to one of our weekly community challenges, 40+ Microlearning Examples Created in Rise 360 #407. Interested in customizing one of these examples for your team? If you’re an Articulate 360 subscriber or trialer, you can edit all of the examples linked throughout this post by choosing the course from our Rise 360 microlearning content templates. Here’s a short video showing how to do that: What’s the latest microlearning course you’ve created? Tell us about it in the comments—and feel free to ask any questions you might have! Like this article? Subscribe to our newsletter to get the latest e-learning inspiration and insights directly in your inbox. You can also find us on LinkedIn and Twitter.4.5KViews0likes10Comments