template
42 TopicsLevel Up Your E-Learning With These Popular Game Templates
Since we’re on the topic of games, let’s start off with a “Would you rather . . .” question. Here we go: Would you rather take a one-hour online test or play a one-hour online game? My bet is that you chose the one-hour game. And that’s no surprise—games are usually fun, whereas tests can be boring or difficult. But they don’t have to be! If you use gamification elements in your content—or even turn the entire learning experience into a game—you can boost learner engagement and drive performance. To help you get your game on, check out these popular game templates that you can download and customize to fit your learners’ needs. Storyline: Vocabulary Guessing Game With multiple choice questions, learners can sometimes simply guess the correct option. If you want a fun way to increase the challenge, try this vocabulary guessing game by Karlis Sprogis instead. By giving learners the number of letters in the word and limiting the number of attempts, you’re appealing to their competitive nature—will they find the correct answer in time? Or will they see the dreaded game-over screen? Storyline: Jeopardy-Inspired Game Show Template Do you need to test learners on multiple topics? This popular game show template by Sarah Hodge is just the thing to turn a boring assessment into a familiar and fun quizzing experience. Storyline: Countdown Quiz Game Want to see how adding game-like elements to your assessments can motivate learners? Then check out this countdown quiz game by Allison LaMotte. The more questions you get right, the more stars you earn, incentivizing learners to retry sections until they get a perfect score. Storyline 360: Angry Words Side-Scrolling Game If your employees communicate often with customers, the last thing you want is for them to wing it. Try teaching learners which phrases are helpful with this word side-scrolling game by Jonathan Hill. Who knew customer service content could be so much fun? Storyline: Codenames-Inspired Learning Game Need to get new employees up to speed on workplace acronyms and terminology? This learning game by Allison LaMotte will help them catch up in no time! By solving clues and looking for similarities, this game makes it fun to define individual terms and see how they all connect. Storyline: Gamified Quiz Template With Timer Need to check if employees can think and act fast? This timed quiz by Sarah Hodge challenges learners to quickly answer questions to prove they have what it takes. Wrap-Up So what are you waiting for? Go ahead and download any or all of these games and gamification examples and customize them to fit your needs. Or, create your own game-inspired project and share it in the comments below! We love seeing new and innovative ways to engage learners. If you need more inspiration, head on over to the weekly challenges, downloads, and examples to see other creative ideas. Want to try building something similar in Storyline 360, but don’t have Articulate 360? Start a free 30-day trial.7.3KViews1like2CommentsMake Working with SMEs a Breeze with These 3 Downloads
One of my favorite things about being an e-learning designer is creating courses on a wide variety of topics. I’ve learned so much over the years! When I look back on it, it’s almost like I had to become an expert in every subject in order to create the most effective learning experience. And while some of my knowledge came from my own research, more often than not it was gleaned from the content provided by my project’s Subject Matter Experts (SMEs). Subject Matter Experts play a critical role in course design. They have the knowledge, experience, and insight to help you create the most impactful training. Despite their importance to your projects, working with SMEs can also be challenging. From different perspectives around how content should be presented to old-fashioned beliefs around how people learn, many e-learning pros find themselves in a battle of wills with their SMEs when all they really want is a productive partnership. This problem can be especially vexing when creating custom e-learning in a powerful app like Storyline 360. With so many creative possibilities, there are countless ways to present content. So how do you help your SMEs visualize different treatments and bridge gaps in understanding, all while building positive relationships with your SMEs? Here are three documents I’ve found essential for communicating clearly and aligning expectations from the start. Document 1: Project Kickoff Questions Before meeting with your project’s SMEs, it pays to do a little prep work. If you already have some source content pulled together, study it to get a basic understanding of the material. And if you don’t have content, research the topic or the company to make the most of your time with your SMEs. As you study, prepare a list of questions to help guide the conversation and show the SME how much you value their time. Need to kick-start your thinking? Download and customize this Project Kickoff Questionnaire for your needs. Download With all of your prep work done, you’re ready to set up a meeting with your SME to discuss the project. Make sure to bring your list of questions, and then listen actively and take notes. This is your time to build trust with your SMEs and identify knowledge and performance gaps to determine the right solution. Document 2: Project Plan After you determine the right solution, it’s time to put the details in writing so you’re all on the same page. A project plan can be a great way to align expectations. In the project plan, you can include the project background, course information, deliverables, timelines, and any other important details. Once you’re done preparing the project plan, have the SME review it and confirm its accuracy before moving forward with design. Need help creating a project plan? I’ve got you covered! Download this free project plan template. Download Document 3: Storyboard Now that you and the SME are on the same page, it’s time to start designing the project. If you’re using a slide-based authoring app like Storyline 360, the best way to make sure you have a solid foundation for development is to create a storyboard. A storyboard is the blueprint for a course that outlines the content screen by screen. Storyboards help your SMEs visualize how the content will flow and allows them to make edits before you start development in your authoring app. Note: If you’re using a web-based authoring app like Rise 360, you can skip the storyboarding phase and go straight to development since it’s easy to use and quick to make changes. Need help getting started? Then download and customize this storyboard template with your content. Download What Next? After the storyboard is finalized, you can feel confident knowing you have a solid foundation to start building your course. Taking the time to develop project kickoff questions, create a clear project plan, and storyboard the content before you start developing it in your authoring app will set you, the SME, and the learners up for success. For more ideas on working with SMEs, check out this series on Everything You Need to Know About Working with SMEs. Follow us on Twitter and come back to E-Learning Heroes regularly for more helpful advice on everything related to e-learning. If you have any questions, please share them in the comments.5.9KViews3likes2CommentsWhat Can You Do with Pantone’s Color of the Year? #63
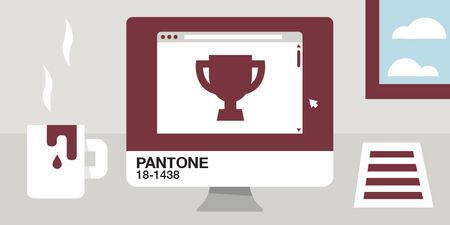
Pantone Color of the Year #63: Challenge | Recap It’s official! Pantone just announced its 2015 color of the year! That means e-learning designers from around the world will be working this “stirring and flavorful shade” in their demos, courses, and templates. Challenge of the week This week your challenge is to design an e-learning template or interaction using Marsala as the primary color. Your slides can be static or built out as working interactions. Your goal is to work from a single color and show how you will carry that color across your design templates. Color Tints & Hues One easy way to work with the color is to create tints and or shades to use for secondary colors. Here’s a quick guide to Marsala’s tints and shades created with the color toner generator I created last year. Color Pairings Looking for some color combinations? Try using one of Pantone’s recommended pairings. Resources If you’re looking for ideas, consider re-designing one of the templates from our downloads section. Since the templates are already built, you’re free to focus your creativity on the colors. Here are some good blog articles on setting up templates: Here’s How to Build an E-Learning Template That Will Rock Your World Inspiring Designs to Keep Your E-Learning Courses Looking Fresh How to Create an E-Learning Template That Works Last year’s Pantone color challenge: Create a Radiant Template with Pantone’s Color of the Year Share your e-learning work Comments: Use the comments section below to share a link to your published example and blog post. Forums: Start your own thread and share a link to your published example.. Personal blog: If you have a blog, please consider writing about your challenges. We’ll link back to your posts so the great work you’re sharing gets even more exposure. Twitter: If you share your demos on Twitter, try using #ELHChallenge so your tweeps can track your e-learning coolness. Facebook: Share your work on our Facebook page by replying to this Facebook post with a link to your example. Last week’s e-learning challenge: E-Learning Recap: Challenge | Recap Wishing you a coloriffic week, E-Learning Heroes! New to the e-learning challenges? The weekly challenges are ongoing opportunities to learn, share, and build your e-learning portfolios. You can jump into any or all of the previous challenges anytime you want. I’ll update the recap posts to include your demos. If you have a blog, please consider writing about your challenges. We’ll link back to your posts so the great work you’re sharing gets even more exposure. If you share your demos on Twitter, try using #ELHChallenge so your tweeps can track your e-learning coolness.2.7KViews0likes122Comments58 Examples of Tabs Interactions in E-Learning #2
E-Learning Tabs Interactions RECAP #2: Challenge | Recap New to the Challenges? If you have a blog, please consider writing about your challenges. We’ll link back to your posts so the great work you’re sharing gets even more exposure. If you share your demos on Twitter, try using #ELHChallenge so your tweeps can track your e-learning coolness. Have a tabs-tactic week, E-Learning Heroes! Montse Anderson View project | Download | Montse Anderson | Website | @mLearning Anuradha Gopu View project | Anuradha Gopu | Website | @AnuradhaGopu Jeremy Stiffler View project | Jeremy Stiffler | Website Montse Anderson View project | Download | Montse Anderson | Website | @mLearning View project | Download | Montse Anderson | Website | @mLearning View project | Download | Montse Anderson | Website | @mLearning Dana Kocalis View project | Learn more | Dana Dutiel | Website | @danadutiel Anne Gossett View project | Anne Gossett | Website Salvo Baglieri View project | Salvo Baglieri Phil Mayor View project | Download | Phil Mayor | Website | @philmayor View project | Download | Phil Mayor | Website | @philmayor Jessica Quach View project | Jessica Quach Rachel Williams View project | Rachel Williams Johar Singh View project | Learn more | Johar Singh | Website | @joharsinghs Heather Steckley View demo | Heather Steckley View demo | Heather Steckley View demo | Heather Steckley Przemyslaw Hubisz View demo | Download | Przemyslaw Hubisz Kevin Thorn View Demo | Download | Kevin Thorn | Website | @learnnuggets Montse Anderson View Demo | Download | Montse Anderson | Website | @mLearning Sanjib Nanda View demo | Sanjib Nanda | Website Jenise Cook View demo | Download | Jenise Cook | Website | @jenisecook Matt Guyan View Demo | Download | Matt Guyan | Website | @MattGuyan Jackie Van Nice View Demo | Jackie Van Nice | Website | @jackietrains Jeff Kortenbosch View Demo | Jeff Kortenbosch | Website | @elearningjeff Ashley Chiasson View Demo | Learn more & download | Ashley Chiasson | @amdchiasson Vonetta Booker View demo | Vonetta Booker | Website | @YourRightHandVA Kawstov FLIP View Demo | Download | Kawstov FLIP | Website Mitchell Palsson Download (PowerPoint) | Mitchell Palsson | Website Daniel Adeboye Download (PowerPoint) | Daniel Adeboye | Website Paul Alders View demo | Download (SL1) | Paul Alders | Website | @paulalders Jacinta Penn View demo | Jacinta Penn | Website | @workbrightnz Paul Alders View demo | Learn more | Download (SL2) | Paul Alders | Website | @paulalders Michael Jones View demo | Learn more | Download | Michael Jones | @MPJ_InstrDesign Sajna Thomas View demo | Sajna Thomas Ashi Tandon View demo | Learn more & download | Ashi Tandon | Website | @ashi_tandon Malvika Malhotra View demo | Download (Storyline) | Malvika Malhotra Alexander Salas View demo | Learn more & download | Alexander Salas | Website |@stylelearn Dax Lovett View demo | Learn more | Dax Lovett | Website Deanna Brigman View demo | Deanna Brigman | Website | @DMBrigman Dana Dutiel View demo | Learn more | Dana Dutiel | Website | @danadutiel Malvika Malhotra View project | Download | Malvika Malhotra | Website Phil Mayor View project | Phil Mayor | Website | @philmayor More About the E-Learning Challenges The weekly challenges are ongoing opportunities to learn, share, and build your e-learning portfolios. You can jump into any or all of the previous challenges anytime you want. I’ll update the recap posts to include your demos. Show Us Your Best Folder Tabs Examples! The tabs challenge is still open! If you have one or more ideas you'd like to share, please jump over to the original challenge and post your links in the comments section. I'll update this recap page to include your examples.2.4KViews0likes0Comments26 Creative Ways to Use Click-and-Reveal Interactions in E-Learning #349
Click-and-Reveal Examples RECAP #349: Challenge | Recap This week's challenge asked course designers to share creative ways to show more info using click-and-reveal interactions. Rebecca Cottongim Example | Learn more | Video overview | Rebecca Cottongim Sarah Scott Example | Sarah Scott Karin Lorbeck Example | Karin Lorbeck Nik Bowers Example | Nik Bowers Ron Katz Example | Ron Katz | Website Mark Livelsberger Example | Mark Livelsberger Samuel Apata Example | Download | Samuel Apata | Website | @afrostem Janie Liz Sampaga Example | Janie Liz Sampaga | Website Richard Watson Example | Learn more | Richard Watson | Website | @rwatsonID Emily Chorley Example | Emily Chorley | Website Stephanie Bowling Example | Stephanie Bowling Yvonne Urra-Bazain Example | Yvonne Urra-Bazain | Website Priyanka Rastogi Example | Priyanka Rastogi Hilla Schlegel Example | Hilla Schlegel Alicia de Billy Example | Alicia de Billy Jodi Sansone Example | Jodi Sansone | Website | @jodimsansone Tracy Carroll Example | Blog | Tracy Carroll | Website | @1tracycarroll Jonathan Hill Example | Jonathan Hill | Website | @DevByPowerPoint Renee Stern Example | Renee Stern | Website Chris Hodgson Example | Learn more | Chris Hodgson | Website | @skriss Alicia de Billy Example | Alicia de Billy Amar Kulshreshtha Example | Learn more | Amar Kulshreshtha | Website | @AmarShreshtha Dominik R Example | Dominik R Mohamed Elsamouly Example | Mohamed Elsamouly Morten Holdt Example | Morten Holdt Montse Example & download | Montse | Website | @mLearning New to the E-Learning Challenges? The weekly challenges are ongoing opportunities to learn, share, and build your e-learning portfolios. You can jump into any or all of the previous challenges anytime you want. I’ll update the recap posts to include your demos. If you have a blog, please consider writing about your challenges. We’ll link back to your posts so the great work you’re sharing gets even more exposure. If you share your demos on Twitter, please include #ELHChallenge so your tweeps can track your e-learning coolness. Share Your Click-and-Reveal E-Learning Examples! The click-and-reveal challenge is still open! If you have one or more ideas you'd like to share, please jump over to the original challenge and post your links in the comments section. I'll update this recap page to include your examples.2.2KViews0likes1CommentPresent Data Using Interactive Charts and Graphs #64
Interactive Charts and Graphs #64: Challenge | Recap I recently began reading The Wall Street Journal Guide to Information Graphics. It’s been on my reading list for over a year, but I never took the time to go through it. Until this week. That’s because a blog reader emailed me looking for examples of charts and graphs in e-learning courses. I’ve collected some examples from the news sites, but nothing really focused around online training courses. Knowing how important information graphics are in the community, I thought this would make a great e-learning challenge! Interactive Bar Charts Articulate community member Michael Hinze shared a creative solution for animating bar charts using Storyline 1. Using button sets and custom states, the bar graph updates based on the options selected by the user. View demo | Download Interactive Graphs with Sliders One of my favorite examples is this interactive graph from community member Joanna Kurpiewska. Shared in a recent e-learning sliders challenge, this example makes use of Storyline 2's sliders to adjust the market price and quantities of goods. View the interactive graph Interactive Charts Here's another example from Articulate Super Hero Phil Mayor. Learners are asked to add numeric data to compare their data with the chart's built-in data. View demo Challenge of the week This week your challenge is to show how interactive charts and graphs can be used in online training. You can share a static example of charts and graphs or you can create something more interactive to show and compare data. Resources It always helps to build templates and demos when you have real content. Here are a few resources that can help. If you have another source for data, please share it in the comments. 30 Resources to Find the Data You Need United States Census Bureau Charts of Major Indexes Share your e-learning work Comments: Use the comments section below to share a link to your published example and blog post. Forums: Start your own thread and share a link to your published example.. Personal blog: If you have a blog, please consider writing about your challenges. We’ll link back to your posts so the great work you’re sharing gets even more exposure. Twitter: If you share your demos on Twitter, try using #ELHChallenge so your tweeps can track your e-learning coolness. Facebook: Share your work on our Facebook page by replying to this Facebook post with a link to your example. Last week’s e-learning challenge: E-Learning Recap #63: Challenge | Recap Wishing you a chart-tastic week, E-Learning Heroes! New to the e-learning challenges? The weekly challenges are ongoing opportunities to learn, share, and build your e-learning portfolios. You can jump into any or all of the previous challenges anytime you want. I’ll update the recap posts to include your demos. If you have a blog, please consider writing about your challenges. We’ll link back to your posts so the great work you’re sharing gets even more exposure. If you share your demos on Twitter, try using #ELHChallenge so your tweeps can track your e-learning coolness.2KViews0likes99CommentsA Behind-the-Scenes Look at How I Designed This Gamified Quiz
Have you ever wanted to create a gamified quiz, but didn’t know where to start? Or maybe you had a few ideas, but felt a little intimidated and decided to save it for a rainy day...that never came? I feel you. I’ve been there. But guess what? I went for it! Here’s how it turned out: Click here to view the interactive version and download the template. And if I can do it, you can too! In this article, I’m going to walk you through my design process so you can see how I got from an idea to a finished product. Let’s dive in! Coming Up with the Concept One of the hardest parts of gamifying your e-learning course is deciding which game elements to add. There are so many options it can be hard to decide which ones to focus on. There’s no right or wrong answer, but, as always, it’s important to keep your learning objectives and target audience in mind. Since I didn’t have an actual project to tackle, I tried to imagine a situation in which it may be beneficial to gamify a course. Then it came to me! What if I created a quiz for learners who need to memorize a bunch of information—vocabulary words, for example? When it comes to memorization, one thing that can be helpful is repetition. That’s why people use flashcards, so they can run through them over and over, remembering more and more each time. But repetition can also be boring, so why not make it fun? With that in mind, I decided to incorporate the following things: Question banks. I wanted to help commit the answers to long-term memory by randomizing and spacing out the questions and not simply using short-term memory to recall the order. A countdown timer. I wanted to create a sense of urgency and excitement, but also to encourage learners to trust their gut and go with their first instinct rather than overthinking it. Extra time. I added extra time to the clock to reward learners for correct answers and to give them more time to think about subsequent questions. An incentive to try again. Instead of forcing learners to get a perfect score to move forward, I wanted to entice learners to beat their previous score, so I set up a system of stars. Learners only need one star (or 10 correct answers) to pass, but if they want to earn two, they need to get 15 correct answers, and to earn all three stars, they have to get a perfect score. The hope is that learners who only get one star will want to try again until they get two or three stars. Levels. I broke the game up into levels that unlock as they go to give learners a sense of achievement. Sound effects. I embellished the game with sound effects to give it a more playful feel. Now that you have some insight into the ideation process, let’s take a look at how I decided on the design. Designing the Graphics Since my gamified quiz is intended to be a template, I wanted to stick to a simple design that could be used for a broad range of topics and could easily be adapted to fit any company’s brand guidelines. I decided to go with a bright, colorful palette to give it a fun vibe. Initially, I wasn’t sure if I wanted to use a background image or not, so I just left the background white. Here’s what my first draft looked like: But I wasn’t 100 percent satisfied with this first version. The font didn’t feel “fun” enough and all the gray made for visuals that were a little too “blah,” so I started brainstorming ways to improve upon my design. When I’m looking for inspiration, I often try searching Content Library 360 to see if anything jumps out at me. And sure enough, I stumbled upon an illustration of a sky with a big cloud and it just clicked—that’s it! What better way to give my game a lighthearted vibe? After I added the background, things started falling into place. I swapped out the gray for a darker shade of blue, to match the sky, and replaced the boring font with this fun, game-inspired one. Now I was getting somewhere! Here’s what my second version looked like: But something still didn’t feel right. I decided to see what it would look like if the pathway followed the outline of the clouds, to give it a more integrated, cohesive look. Once I was happy with the main menu slide, I created the question slides along the same lines, changing the colors for each level. At this point, I was feeling pretty good about my graphics, so I started thinking about sound effects. Choosing Sound Effects To really give my quiz a game-like feel, I decided to add some sound effects. I was careful not to go overboard, which would distract from the learning experience. Here’s what I landed on: A theme song. I wanted something to play at the beginning and end of the game as well as on the results slide to set the tone for the course. I wasn’t sure exactly what I wanted it to sound like, but I was imagining something a little retro to fit with the graphic style I chose. Correct/incorrect sounds. I thought it would be nice to find sound effects to signal to learners whether they’ve answered a question correctly or incorrectly. I wanted something that was short—so it didn’t get annoying—and unambiguous—so learners wouldn’t be left wondering what it meant. A “time’s up” sound. Finally, I wanted to find another short tone to signal when the time runs out on the clock—like an alarm or a buzzer. With that decided, I started my search. First, I headed over to this list of websites with free sound effects. After looking at a few options, I concentrated my efforts on freesound.org since it’s easy to navigate and the licensing terms for each download are clearly laid out. From there, I started trying out a few keywords—like game, theme song, right, wrong, alarm, buzzer—and gave each one a listen. To include my sound effects in my template, I made sure to choose sound effects that were licensed under Creative Commons 0—so I could use and redistribute them freely. That narrowed down my options, which actually made it easier to choose. If you’ve never used sound effects in your courses before, check out this article for advice on using them effectively: Tips for Using Sound Effects in E-Learning. More Resources Hopefully you found this sneak peek into my design process useful! If you downloaded the template and need some help customizing it, be sure to check out this how-to article, where I walk through how to do that: How To Customize This Storyline 360 Countdown Quiz Game Template. If you want to dig deeper into the concept of gamification and how to apply it to your e-learning courses, check out these helpful articles: Gamification Techniques: How to Apply Them to E-Learning Gamification: How and Why Does It Relate to E-Learning? 5 Visual Design Tips for Gamified E-Learning And here are a couple of gamified course templates in case you’re short on time: Randomized Board Game Dice Quiz Game E-Learning Battleship Game Crossword Puzzle Game Not finding what you’re looking for? There are tons more where these came from! Hop on over to the downloads hub to browse all the Storyline templates. Subscribe to our newsletter to get the latest e-learning inspiration and insights directly in your inbox. You can also find us on LinkedIn and X (Formerly Twitter).1.9KViews0likes14Comments