ai assistant
41 TopicsMeet Your New Co-Presenter: What I Learned Building with AI Avatars in Rise 360
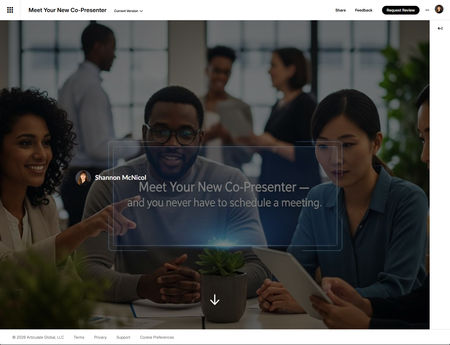
If you've been following along on E-Learning Heroes lately, you've probably noticed AI Avatars starting to pop up in people's Rise 360 projects. I decided to take it for a real spin — not just a quick test, but an actual microlearning build — and I want to share what I found. The good, the genuinely useful, and the "wish I'd known that before I hit publish." The result is a five-slide microlearning called Meet Your New Co-Presenter, built entirely in Rise 360 with AI Avatars as the hook. Here's what I learned along the way. What AI Avatars actually does In case you haven't tried it yet: AI Avatars is a native Rise 360 feature that generates a lifelike on-screen presenter from a written script. You type what you want the avatar to say, choose a presenter style, and Rise generates a speaking video — no camera, no studio, no scheduling a subject matter expert who keeps canceling on you. It lives inside Rise as a Media Block, which means it drops cleanly into your lesson flow just like any other media element. The generated video includes Rise's native player controls automatically, so learners can pause, rewind, and replay without any extra setup on your end. For certain use cases — quick scenario illustrations, course introductions, process overviews — it's a genuinely useful addition to the toolkit. And the speed of it is real. From script to generated avatar, you're talking minutes, not days. What worked well The hook moment is powerful. There's something genuinely compelling about opening a course with a speaking presenter that you built from a single paragraph of text. For the first slide of this microlearning, I used an AI Avatar to deliver the hook line — "What if your next training course already had a presenter?" — and then immediately showed learners the exact script that produced it. The meta moment landed exactly the way I hoped. Script-first thinking is actually good instructional design practice. Because the avatar reads exactly what you write, you're forced to write the way people talk, not the way people write slide decks. Short sentences. Active voice. A conversational rhythm. Those are things we should be doing anyway — AI Avatars just enforces it. Iteration is fast. Don't like how something sounds? Rewrite a sentence, regenerate, and you've got a new version in a couple of minutes. No reshoots. No re-recording. No waiting on anyone. That speed genuinely changes how you think about revision. Avatar selection is a real design decision — and a good one. The range of avatar styles available gives you enough variety to be intentional about representation. Choosing a presenter who reflects your learner audience is a small decision with real impact on engagement and trust. You can build a custom avatar — and it's easier than you think Here's the part that genuinely surprised me, and that I think more IDs need to know about: you're not limited to the preset avatar options. You can create a custom AI Avatar using a plain-language prompt describing exactly who you want your presenter to be. For this microlearning, I created a custom avatar from scratch using this prompt: A professional woman in her 50s with long, straight auburn-brown hair and bangs. She has light skin, green-hazel eyes, and a warm, confident smile. She is wearing a black blazer over a black turtleneck. She is standing in a modern professional office environment with soft, neutral lighting. Her expression is approachable and knowledgeable — like a trusted subject matter expert presenting to colleagues. She faces the camera directly with a poised, engaging demeanor. That's it. One paragraph. And what came back was a polished, realistic-looking presenter that felt like she belonged in the course — not a generic stock character, but someone with a specific look, a specific energy, and a specific professional context. Think about what that means for your work. If you're building for a specific industry, you can describe a presenter who looks like they actually work in that field. If you have brand guidelines around representation, you can build a presenter who reflects them precisely. If your learner audience is specific — frontline healthcare workers, financial advisors, retail managers — you can describe a presenter who looks like a trusted colleague rather than a generic talking head. A few tips for writing custom avatar prompts that get good results: Be specific about appearance. Hair color and style, eye color, approximate age, skin tone — the more detail you give, the more consistent and intentional the result. Vague prompts produce vague avatars. Describe the setting, not just the person. The background matters more than you'd think. "Modern professional office with soft neutral lighting" reads completely differently than "bright open-plan workspace" or "clinical white background." The environment signals context to your learner before the avatar says a single word. Name the energy, not just the look. Phrases like "approachable and knowledgeable," "warm but authoritative," or "confident and direct" genuinely influence how the avatar presents. Think of it like writing a casting note for an actor. Iterate the prompt, not just the script. If the first result isn't quite right, adjust the prompt description and regenerate. Small tweaks — changing "business casual" to "blazer and turtleneck," for example — can shift the result meaningfully. The custom avatar prompt is, in my view, one of the most underrated parts of this feature. The ability to describe your ideal presenter and actually get them — without a casting call, a shoot day, or a post-production budget — is genuinely remarkable. Use it intentionally. What to know before you dive in Here's where I want to be honest with you, because the E-Learning Heroes community deserves the real version, not the marketing version. You cannot edit the generated video. This is the big one. Once Rise generates your avatar video, what you get is what you get. There's no trim tool. No way to cut a section. No way to splice takes together. I ran into this firsthand: for some reason, my avatar was still visibly moving — still talking — at the very end of the clip, even after the script had ended. It looked awkward. And there was nothing I could do about it. No way to cut those last few seconds. I actually left that version in the microlearning intentionally so you can see exactly what I mean — go ahead and watch through to the end of the first slide and you'll catch it. The only fix was to rewrite the script, add a cleaner closing line, and regenerate the whole thing and hope the new version ended more gracefully. If you're used to working with tools like Camtasia or even a basic video editor where you can trim a clip to the frame, this limitation will feel significant. Plan your scripts carefully on the front end — because you can't fix it on the back end. You cannot export the avatar video out of Rise. The generated video lives inside Rise and that's where it stays. You can't download it, bring it into another tool for editing, or repurpose it elsewhere. If you were hoping to grab the file and use it in a Storyline project or a standalone MP4, that's not currently possible. The Media Block is the only home for AI Avatars. This has layout implications. Because AI Avatars only lives in a Rise Media Block, you don't have the layout flexibility to, say, place the avatar side by side with text content in the same block. I originally designed this microlearning with a two-column layout — avatar on the left, script context on the right — but had to rethink it when I realized the Media Block doesn't support that kind of custom positioning. I ended up stacking the avatar above the Code Block content, which actually worked fine once I reframed it: the avatar speaks first, then learners look down and see the script that produced it. Flexibility is limited overall. Beyond the editing and export limitations, you're working within whatever Rise generates. You can influence the output through your script, but you can't control pacing, emphasis, pause timing, or the avatar's gestural behavior in any granular way. What you see is what the AI decided to do with your text. How I worked around the limitations A few things that helped: Write for endings. Since you can't trim, your last line matters a lot. Write a clean, definitive closing sentence that gives the avatar a natural stopping point. Something like "Let's take a look at how it works" worked better for me than an open-ended line that trailed off. Keep scripts short and focused. The shorter the script, the easier it is to regenerate if something doesn't land right. I kept every avatar script in this microlearning to 20–30 seconds. Fast iteration is only an advantage if you're not regenerating a two-minute monologue every time. Use the avatar strategically, not on every slide. I originally planned to include an AI Avatar on each of the five slides. After working through the layout constraints and the Media Block limitation, I scaled back to just the first slide. That was actually the right call — one strong hook moment is more impactful than a talking head on every screen, and it kept the rest of the microlearning moving at a good pace. Lean into Code Blocks for layout control. Since the avatar lives in a Media Block and I needed more visual control over the surrounding content, I built each slide's content layout as a custom Code Block. This gave me full control over typography, spacing, animations, and interactivity — things Rise's native blocks don't always offer. If you're comfortable with HTML, CSS, and JavaScript, Code Blocks are where you can push Rise further than it's designed to go. The bottom line AI Avatars is a genuinely useful feature — with real constraints. It's fast, it's accessible, and it removes a meaningful barrier for IDs who want a human presence in their courses but don't have the budget, equipment, or scheduling flexibility for recorded video. But go in clear-eyed. You're trading editorial control for speed and convenience. If your workflow depends on being able to trim, cut, export, or precisely control the output, you'll run into walls. If you can write a tight script, embrace iteration, and design around the tool's constraints rather than against them — you'll find a lot to like. I'd love to hear how others are using AI Avatars in their own projects — especially if you've found creative workarounds I haven't thought of yet. Drop your thoughts in the comments below. Meet Your New Co-Presenter1.2KViews7likes8CommentsCoded Interactions
I've recently been experimenting with coded interactions in Rise 360 to see how far I can push the interactivity beyond the standard blocks. I've been using GPT to help produce and refine the code, then tweaking and personalising the interactions to meet specific brand guidelines and learning requirements. I'm really happy with the results so far, and it's opened up a lot of possibilities for creating more bespoke learning experiences directly within Rise. There are some limitations I've noticed during testing, particularly around incorporating audio effectively within the interactions and ensuring they remain fully responsive across different screen sizes and mobile devices. I'd be interested to hear from other eLearning developers who are experimenting with coded interactions: What limitations have you come across? How have you approached responsiveness and accessibility? Do you see coded interactions becoming a bigger part of how we build bespoke experiences in Rise? Here's an example I've been working on: https://360.articulate.com/review/content/42e03dcc-6233-4bf0-908e-64d5543c0c7c/review674Views5likes8CommentsADDIE Adventure
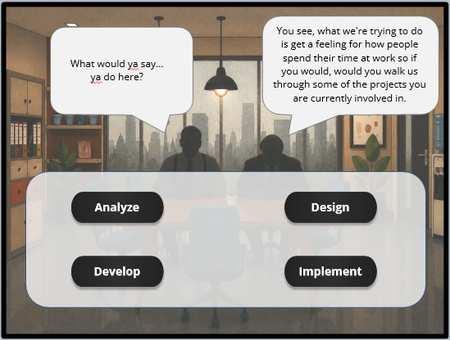
I was once again checking out the different projects that people have shown off and DavidTaits Escape Room | E-Learning Heroes caught my attention. I appreciated his explanation on ho he had the transitions work. During my recent 1on1s with my leader, she challenged me to look into the ADDIE model. At The same time I had been experimenting with some new technical "programming" in storyline while also trying to recreate some of Davids design and I mistakenly mixed some of my ADDIE learning into the SL learning and accidently made a little ADDIE adventure learning module. I was trying to find a way to take information from a drag and drop or multiple choice question and use it in a later slide in order to give more in depth feedback. My solution was to have multiple states for the drop area that translated into a numeric variable that could be recalled later on for more in depth feedback. In my version you find info on each stage of the ADDIE model and then have to use that to determine how to Analyze some issues a team is having and break it up into categories; if the issues are training related, environment related or a knowledge/skill issue. Then look at options for how to design a course and which elements you want to include, from simulations to if a cat video is necessary. Decide which Development tools are best for the task at hand. Is Storyline, Canva, Photoshop, Rise or PowerPoint the way to go. Finally order the best steps for implementation. Once those are completed you will go to a meeting and see if your answers are what management was looking for and get 1 of 5 endings based on those results. ADDIE Adventure | Review 360510Views2likes3CommentsTic-Tac-Trivia
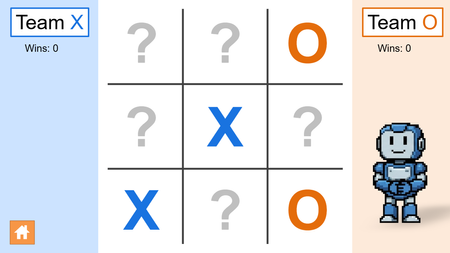
Play Tic-Tac-Trivia Here! Trivia mode The core experience is intended to be a trivia game played by teams of learners. Clicking a square pops up a modal asking a facilitator-defined trivia question. The answer is not displayed until after the Correct or Miss button is clicked since the course is intended to be run by a facilitator presenting for a class. The facilitator will need to know all of the answers to the questions in order to correctly score learner responses. The question bank of answers is explained further down. Correct answers score the square of the team's choice in a game of tic-tac-toe. Incorrect answers pass play to the other team for a chance to score either in the same square or somewhere else. A timer is available for added pressure but not required. This current version also enables a team to clinch the center square with only getting one question right. Since the center square is more strategically important than the rest, a future version will provide the facilitator the option of requiring a team to answer two or three questions in a row correctly before being awarded the center square. Currently the game ends without repeating questions. I'm considering adding the option to repeat questions (randomly) but unsure if that would be of interest to anyone. My suspicion is that adding more questions would be better, but I can see repetition in the same session being of value, especially for long-form answers that may vary from learner to learner while still being right. Question Bank The question bank is where the facilitator enters questions and answers. Note that answers are optional since, as mentioned above, there may be open-ended questions. Additionally, perhaps the answer is so long it doesn't reasonably fit. The current implementation allows questions and answers to be saved to local storage and similarly retrieved from it for use across sessions. Future plans include a popup that will allow facilitators to save question banks under custom names (e.g., "medical terminology"), and then at a later date retrieve the particular question bank they want to use from a list of the ones they've saved prior. If anyone has interest in each bank containing more than 20 questions, please let me know and I'll work to add more pages. Standard Tic-Tac-Toe This is a standard two-player mode that simply alternates back and forth between Xs and Os. No trivia is shown. Wins are tracked instead of the correct/missed answers of the trivia mode. This mode could be used for more casual competition, such as for a trivia-less tiebreaker once all questions are exhausted. Single Player This mode currently supports an easy "AI" player for someone who wants to kill time, or perhaps even instruct someone new in how to play. The easy AI randomly selects an unchosen square on the board and so is not particularly challenging. Future implementations will include medium and hard difficulties. Thoughts I've always been a fan of tools for teachers and facilitators, and I've been tinkering on this particular one since the end of May. The robot images shown in the single-player mode and the handful of sound effects were all generated natively with Storyline 360's AI assistant, though Photoshop was used for some slight improvements to the robot images. If you have any questions, bug reports, or ideas for improvements, please don't hesitate to reach out in the comments below! I will eventually release the .story file for download but want to wrap up the improvements first. Thanks for your patience! Future updates will push to the same hyperlink shared at the top so feel free to leverage that URL if you find the course helpful.258Views1like4Comments“Are You Sure?” in E-Learning #555
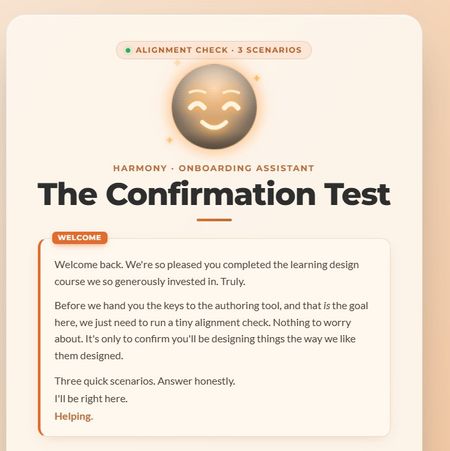
This week, I wanted to lean into the spirit of the confirmation prompt, that moment of pause, of reconsideration, and ask: what if that pause wasn't entirely on your side? The scenario: you're an internal team member who's just come back from a learning design course. You have the master learning design authoring tool. Before you're allowed near the authoring tool, the org's AI guide HARMONY needs to run a quick "Confirmation Test." Three scenarios. Shouldn't take long. HARMONY is very helpful. The "Are you sure?" mechanic does something a little different here. I'll leave it at that. 🙂 A few craft notes for anyone interested in the build: The confirmation prompt UX is deliberately asymmetric; the buttons don't behave the same way depending on which answer you're leaning toward HARMONY has two states that shift based on your choices throughout Three different endings based on your answer tally The fake "analysis" stage has a silent jury. You'll see. I have a lot of fun with Claude Design, Code and all things Claude Would love to know which ending you hit, and whether any of the scenarios felt a little too close to home. 👀 Are you a conformist or a rebel? Find out here Confirmation Test Let me know how many little "interesting" interactions you spot Thanks to DavidAnderson and the Articulate 360 Account Management team for the prompt; this one was a lot of fun. #ElearningChallenge333Views3likes4CommentsThe AI Shift
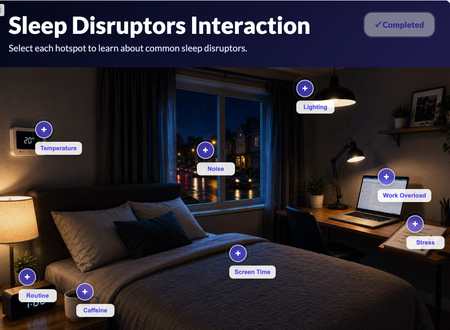
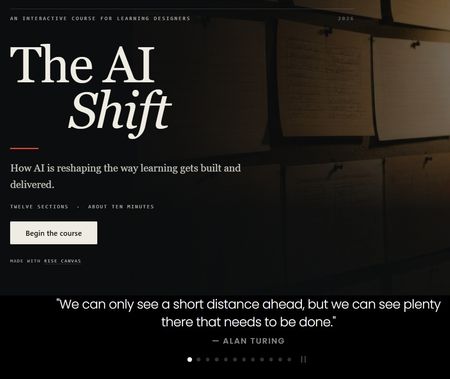
Most people use AI the way they use a search bar. Type something vague, take what comes back. That's how poor course content gets made. This course is about using it deliberately. You'll practise briefing an AI properly, interrogating what it gives you, and deciding what your own expertise still has to supply. The AI Shift Tools used: Canva, Gemini and Rise Canvas613Views4likes3Comments"Wait, SVGs are just code?"
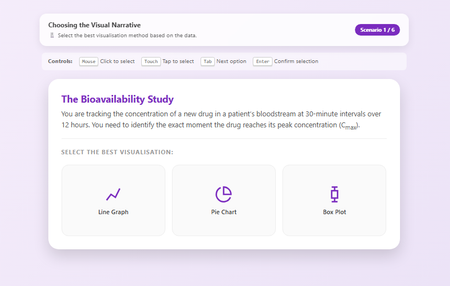
Hi everyone, I have to admit something embarrassing. I was today years old (well, 44 years old to be exact) when I properly realised that SVG files are just code. I always thought of them as "images" you have to save, host, and link to. But no, they're just text! 🤦♂️ That realisation sent me down a rabbit hole, and the result is this: a Visual Narrative Selection Tool that is completely self-contained. No external image files, no hosting headaches, just one single HTML file doing everything. 🔍 What it is: It’s a scenario-based training interaction where learners have to pick the right chart type (e.g., "Is a Pie Chart okay for time-series data?"). If they get it wrong, the feedback doesn't just say "Incorrect"—it actually shows them why using a custom SVG graph generated right there in the browser. ✨ Why I'm sharing it: This is a pure "Zero-Asset" experiment. Because the icons and graphs are all SVG code written directly into the HTML: It's impossible to break: You can't "lose" the image files because they live inside the code. It's lightweight: The whole thing is tiny. It's accessible: Fully navigable via keyboard (Tab/Enter). AI-enabled: with a strong enough visual cue, no other files are required I've shared the source code below. It’s fully commented (with my contact info hidden in a professional comment block at the top) Feel free to download, break it, and tell me what you think. And please tell me I'm not the only one who didn't realise SVGs were this powerful? RISE READY HERE575Views3likes3CommentsOpen-Source: Confidence Self-Check Dashboard (Dual HTML & Storyline Exporter)
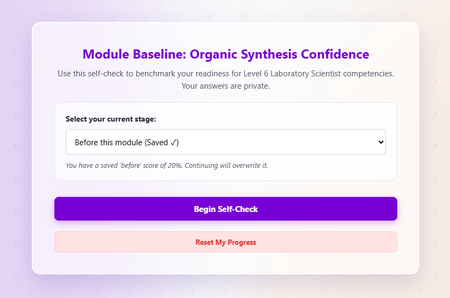
Hi Everyone, It is great to be posting back here after a while! A lot of the custom widgets and micro-apps we see shared across the community are fantastic out of the box, but they often share a common flaw: they are completely hardcoded. If you want to change a question, tweak a score boundary, or alter a feedback message, you have to dig into line after line of tightly coupled JavaScript or manually update dozens of variables inside your authoring tool. Following some great discussions here on the hub—and specifically responding to a note from community member SamanthaGonz271 who mentioned wanting the ability to freely edit and tailor these frameworks, I wanted to take a completely different architectural approach. I have built a modernised, fully state-driven Confidence Self-Check Baseline Tracker (v9.7). Instead of standard text blocks, this framework relies on a modern glassmorphism UI overlay and features a dynamic digital grid canvas. You can preview the interactive widget running live on Review 360 here: 👉 https://360.articulate.com/review/content/d58cf155-636e-4f43-82c9-1832035cd504/review 🚀 What makes this version different? I have engineered a built-in "Designer Mode" directly into the interface. This transforms the widget into an automated production pipeline for your VLE: Dynamic Content Modification: Add or remove questions, upload custom image URLs, configure unique item weights, and adjust percentage performance bands without writing a single line of code. Tabbed Dual-Exporter: Once customised, the engine generates clean production code instantly via a split panel. You can copy the code out as a Standalone web deployment file (HTML) or grab the Storyline JS Trigger payload. 🛠️ Upgraded Learning Features: Pre / Mid / Post Checkpoint Tracking: Learners can capture a baseline at the start of a module, log a mid-point check-in, and execute a final checkout. Visual Distance Travelled Map: The system references localStorage to compute exactly how far the learner has travelled between checkpoints, plotting their growth on an animated spectrum bar and a historic progress node map. Sandbox-Safe PDF Printing: To circumvent strict iframe browser restrictions that block pop-up windows inside modern learning management systems, I have engineered a clean window-write utility that smoothly bypasses pop-up blockers to print or save progress certificates safely. Dead-End Validation Errors: Learners can no longer accidentally submit partial sheets. The engine targets missing inputs and highlights exactly which questions need attention. 📦 How to use it in your own builds: I have attached both the master Source HTML Engine and the Articulate Storyline template file to this post. To customise it, simply run the HTML file locally, click into "Designer Mode" in the top-right corner, modify your curriculum parameters, and copy the clean output code right out of the generator panels. If you are placing it into Storyline, simply copy the code from the Storyline JS Trigger tab and paste it directly into an "Execute JavaScript" trigger on slide start. Special credit to JoeDey for the original inspirational "Perpetual Notepad" concept that got the ball rolling on this community script style. Let me know how you use it in your programs or if you have any feature ideas to push it further! Cheers, Daniel Boyland Forged Frameworks464Views4likes12CommentsIt’s All About That Prompt...
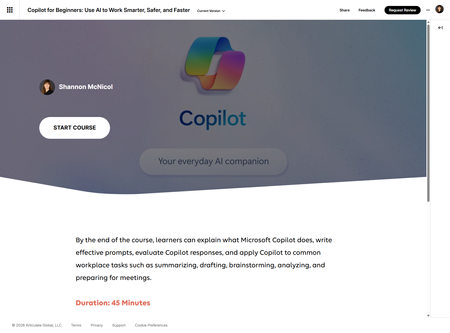
You know that feeling when you have a massive project looming, and your timeline is shorter than a TikTok trend? That was the energy I brought into my latest project. I set out to build a comprehensive, highly interactive course—"Copilot for Beginners: Use AI to Work Smarter, Safer, and Faster"—and I wanted to see just how much I could push the boundaries of rapid development without sacrificing the "WOW" factor. The Secret Sauce: It's All About That Prompt To get this done, I lived by a new mantra (apologies to Meghan Trainor): "Because you know I'm all about that prompt, 'bout that prompt, no trouble..." Let’s be real: teaching AI to beginners is 10% explaining what it is and 90% convincing them that "Please do the thing" is not a valid prompt. The core of this course is dedicated to the art of the ask. I wanted to show learners that if you treat your prompt like a bad text to an ex—vague, confusing, and full of typos—the AI is going to ghost your expectations. 👻 By focusing on high-quality prompting with Claude AI, I’ve been able to move from concept to a bespoke, custom-coded experience at lightning speed. It’s a bit of "prompt-ception"—using expert prompts to build a course that teaches people how to be expert prompters. What usually takes a massive development cycle is coming together faster than I ever thought possible. How I’m Building It (The Tech Stack) I decided to forgo the standard Rise 360 blocks entirely for this one. I wanted a 100% custom feel, so here is the "special ops" toolkit I used instead: The Framework: Everything is built using the </> Code block and Project blocks. For those who haven't tinkered with it, the Project block is a total game-changer—it allows you to upload zipped files (like a video with a custom wrapper or a self-contained web interaction) directly into the lesson. The Custom Visuals: I’m utilizing Custom blocks to build my own unique visuals from scratch. This gives me total creative control over the aesthetic, ensuring that every chart, diagram, and layout perfectly aligns with the Copilot branding rather than relying on generic templates. The Custom Flair: By using the </> Code block, I’m injecting custom HTML and CSS to create a UI that feels completely unique. No "Rise-standard" buttons here! The Digital Mentor: Instead of just text on a screen, I’ve integrated an AI Avatar. This virtual guide walks beginners through the nuances of AI safety and security, making the learning path feel more personal and a lot less robotic. The Brains: Claude AI is my creative partner. I’m using it to "vibe code" the custom interactions, refining the UI/UX in real-time until the functionality is snappy and intuitive. Why Speed Doesn't Kill Quality Building "Smarter, Safer, and Faster" isn't just the course title; it’s the philosophy behind the build. Using AI to handle the heavy lifting of the code means I can focus my energy on the instructional design—ensuring the "Safer" part of the Copilot training actually sticks. What Do You Think? I’m still tinkering with the final transitions and polishing the edges, but I wanted to share the process with the community. How are you all using Project blocks to bring in external zipped assets? Are you experimenting with Custom blocks for your visuals, or sticking to the Rise defaults? How are you teaching "prompt engineering" to people who still struggle with "Ctrl+Alt+Delete"? Drop your thoughts below—I’m all ears (and all about those prompts)! 😆 Copilot for Beginners: Use AI to Work Smarter, Safer, and Faster706Views5likes2Comments- 4Views0likes0Comments