2 Reasons to Use Storyline 360 for Software Simulations

Software simulations are a great way to teach learners how to use a new app or system. They allow you to record a process on your screen and give learners the opportunity to interact with the content by doing things like clicking on specific areas of the application or entering text or data, just like they would in real life.
A lot of thought and preparation goes into creating software simulations—you have to identify which steps to show learners, hide any clutter on your screen, set the recording area size, and work with fake data or a testing environment. Because getting your screen ready for recording can be so time-consuming, it can be a real pain if you end up making a mistake and needing to re-record. Luckily, Storyline 360 gives you everything you need to avoid rework. Let’s take a peek at two of the benefits of using Storyline 360 that make it quick and easy to repurpose and adjust interactive software simulations.
1. Record Once and Reuse as Needed
Some screen recording apps make you decide on the output format—a video tutorial or a simulation—before you record. This means once you’ve recorded your screen, if you were to change your mind about how you want to use it, you would have to re-record the entire thing in a new format.
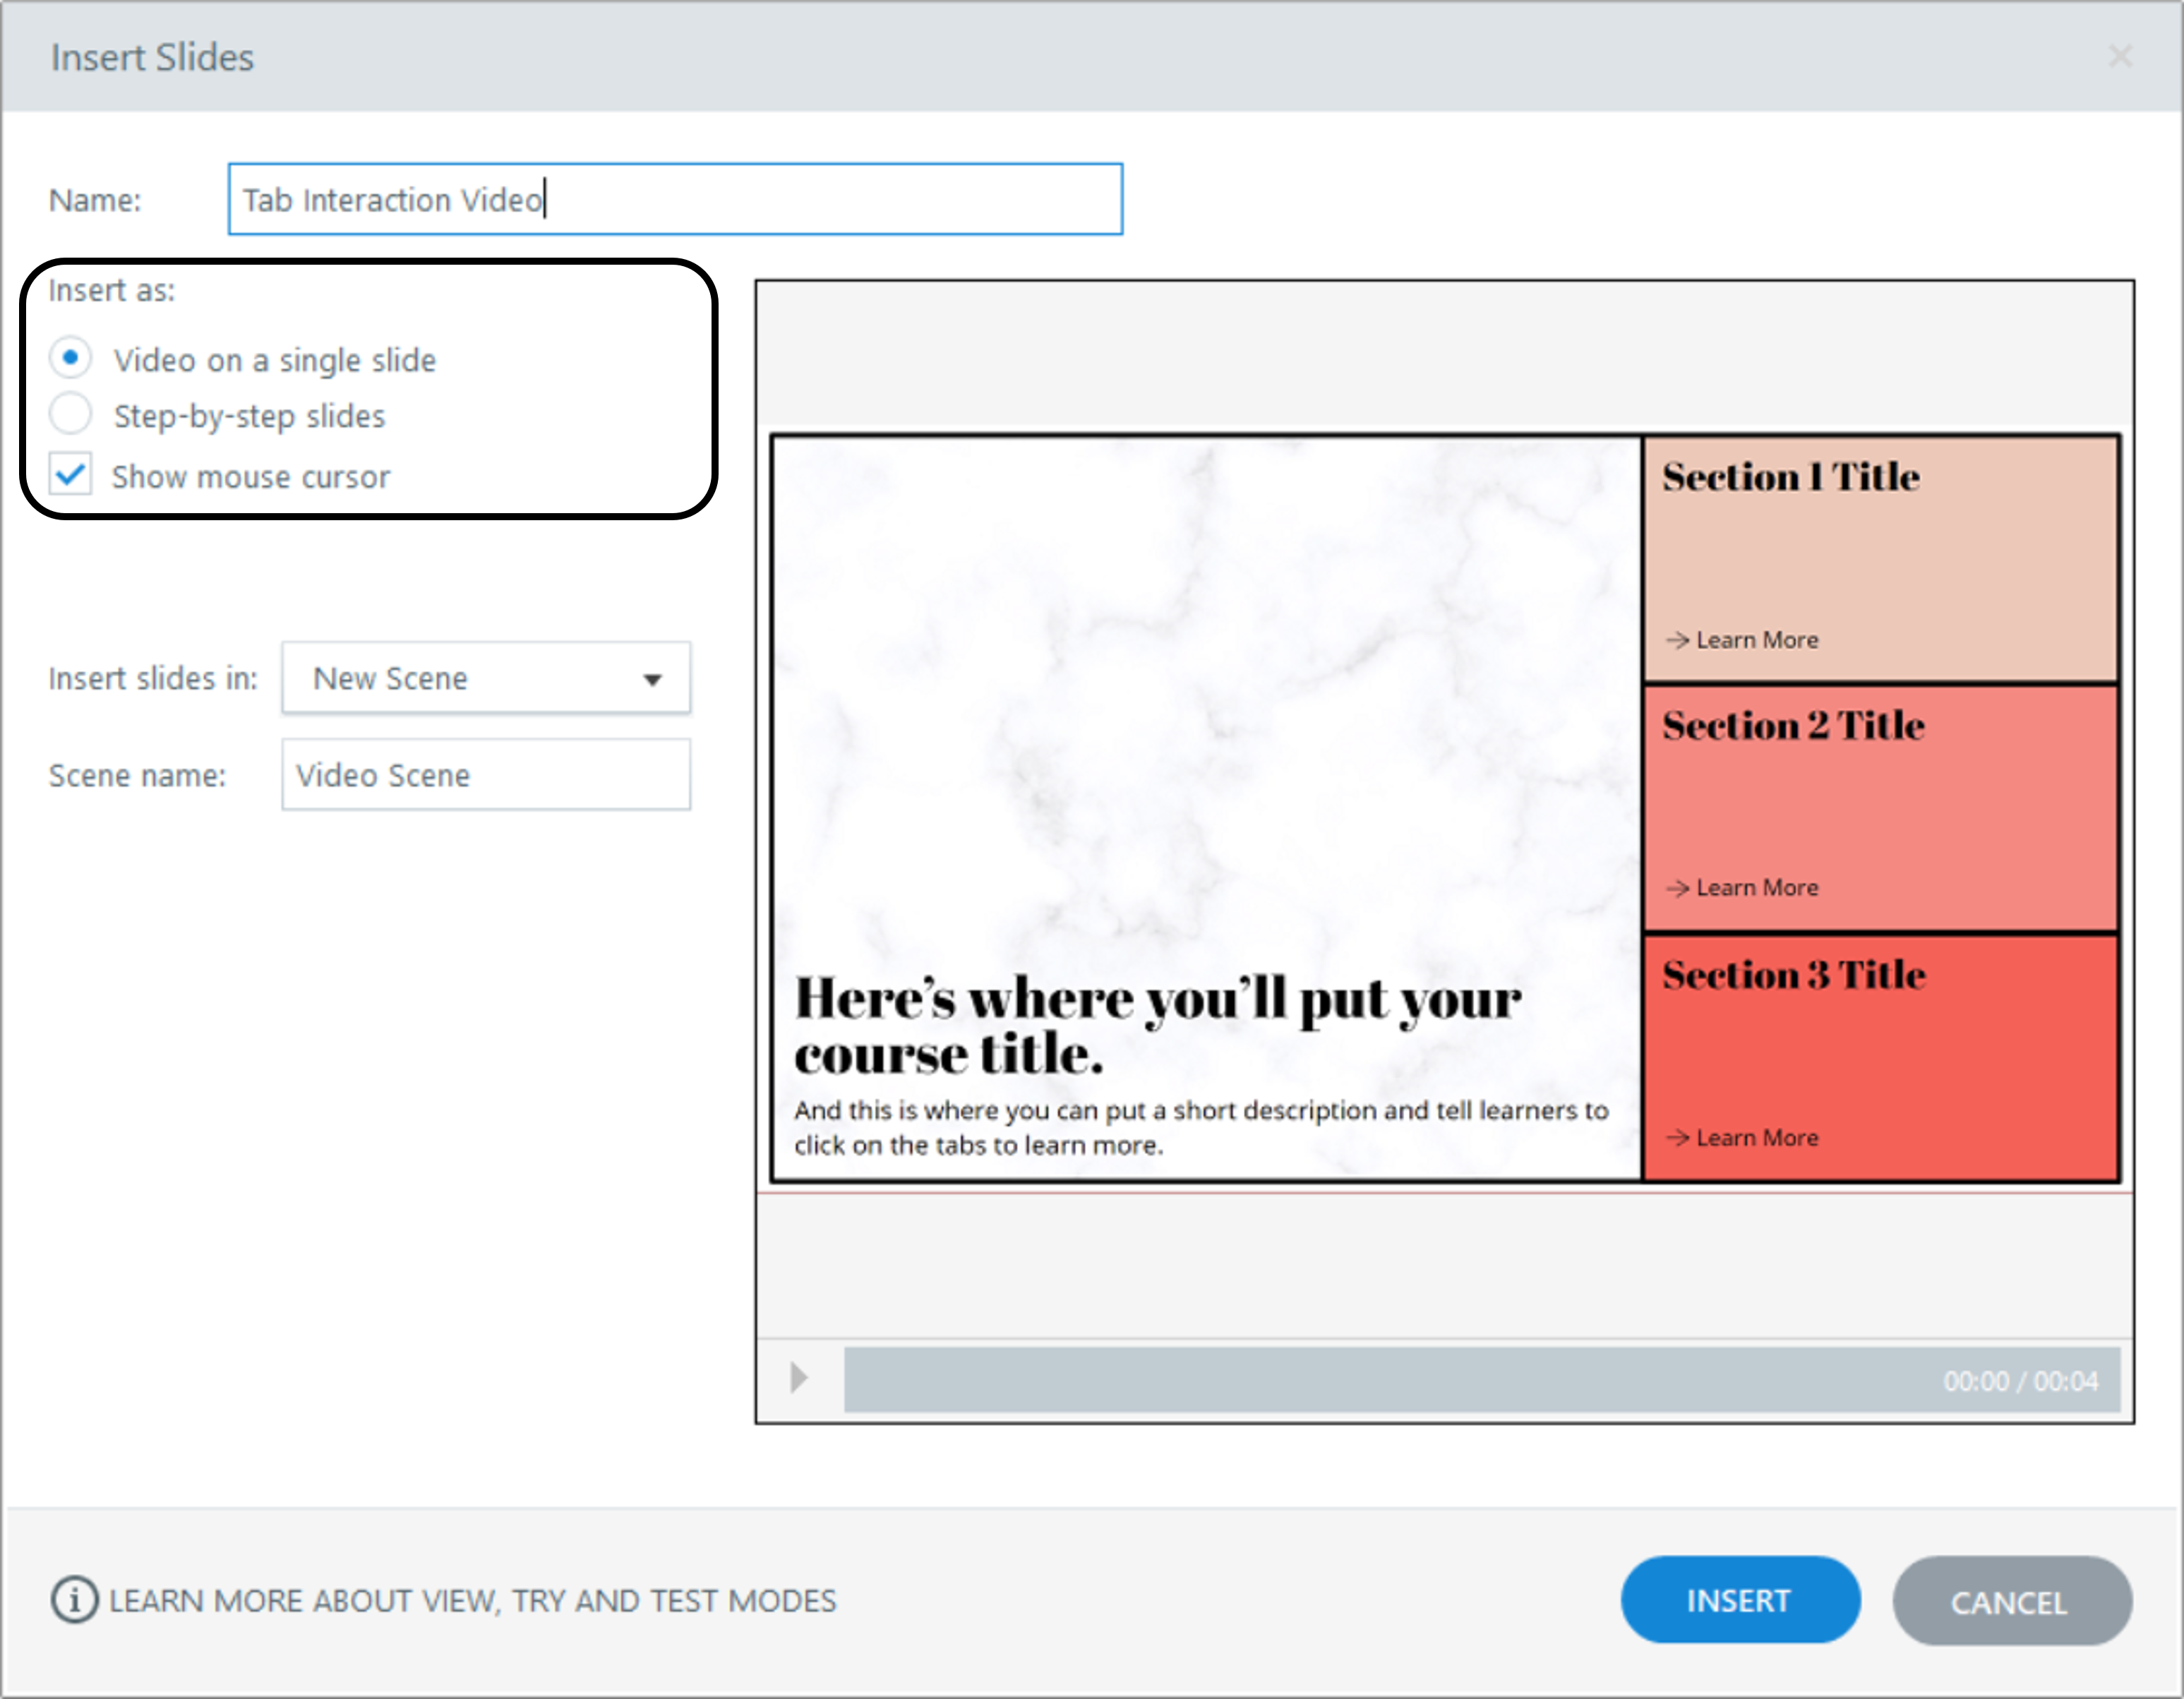
With Storyline 360, you can avoid those snags. You can record your entire process and then choose the format afterward. You have the option to insert it as a video or convert it into a series of slides (which include both demo and simulation modes).
This means you can reuse your recording in different formats without having to start over—saving you tons of time.
2. Make Quick Edits
Picture this: You’re almost done recording your screen when an unwanted pop-up notification appears. You don’t want learners to see that in your screen recording, so what do you do? Depending on the app you’re using, you might have to either start your recording all over again or edit it after the fact in a separate video editing app. Thankfully, that isn’t the case if you’re creating screen recordings with Storyline 360.
If you want to make quick edits to a step-by-step slide, simply right-click on it and select the Action Fine-Tuning option from the menu.

This will open up a window that lets you edit things like the start and end frames of a step. With this handy feature, you can avoid redoing your recording or opening another app to make edits.
Check out this user guide to learn more: Storyline 360: Editing Screen Recordings.
Wrap-Up
As you can see, thanks to these two powerful features, screen recording in Storyline 360 is super fast and easy. It helps you avoid rework by allowing you to make decisions and adjustments after you record. Such a timesaver!
Want to learn more about using this powerful feature? Check out these helpful articles:
- Follow These 5 Steps to Record Your Screen in Storyline 360
- 5 Tips for Creating Effective Software Simulations with Storyline 360
- Follow This Process to Create Software Simulations and Systems Training Like a Pro
Do you have any tips of your own about using Storyline 360 to develop software simulations? Leave them in a comment below!
Want to try something you learned here, but don’t have Articulate 360? Start a free 30-day trial, and come back to E-Learning Heroes regularly for more helpful advice on everything related to e-learning.
15 Comments