3 Easy Ways to Customize the Look of Your Navigation in Storyline
One of the great features of Articulate Storyline is that you can customize just about every aspect of your e-learning course—including the look of your course navigation. While the standardized gray player, with its “Prev” and “Next” buttons, works for many courses, some courses benefit from a higher degree of visual integration with the player and navigation controls. In such cases, it’s easy to change the look and feel of your navigation to work with your course.
Customize the Look of Your Player
The player’s navigation buttons are usually the primary means by which learners navigate an e-learning course. With Storyline, you can customize their fonts, colors, button labels, and more.
Go to the Home tab on the ribbon and select the Player button on the far right of the ribbon. This is where you customize your player! Under the Colors and Effects option, you’ll find a dozen pre-built color schemes. To build a custom color scheme, click Show advanced color and edit the scheme to your liking. Here’s an example of how one project adjusted its look, just by changing the Player colors from dark to light colors.

Edit the Menu
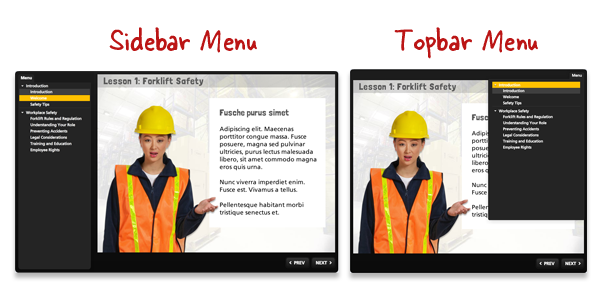
You can also let learners use the course menu for navigation. When you set your course up this way, you have a lot of flexibility about where and when the menu shows on the screen. For example, you can set it up to appear on either side of your slide, keep it tucked away until the learner needs it, or add a menu link on the top bar of the player.
To edit your menu, once again open the Player Properties window. Find the Features tab to choose the location where your menu displays. Make sure the menu option is checked off, and use the up and down arrow to display it either as a sidebar or as a link on the top bar. Next, you can customize the functionality of your menu and update your slide titles with the Menu option. Then, head to the Colors and Effects tab to customize the color scheme. Here’s an example of the same course with the sidebar menu and the topbar menu link.
Create Your Own Navigation Buttons
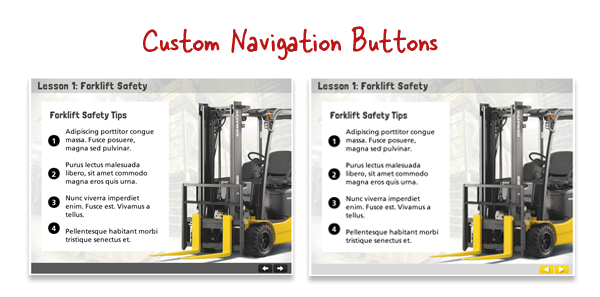
If you decide you don’t want to use the default “Prev” and “Next” buttons that are built into the player, you can easily remove them from each slide. Click the Properties button for your slide, and check or uncheck both the Prev and Next button to include or suppress these buttons on your player.
You can also build your own navigation buttons for your course, using shapes and buttons. Just remember to assign the appropriate triggers, and to always test your links and functionality. Here’s an example of how you can build your own navigation buttons right on the slide to achieve the look you want.
See how easy it is to customize the look of the navigation in your own e-learning projects? With just a few clicks in Storyline’s Player Properties editor, you can completely customize the look of the default navigation buttons and the menu. You also have the option of building your own custom navigation buttons.
If you have an example of a course you’ve created with customized navigation, we’d love to see it, so please share a comment below. We always appreciate your contributions!
Remember, you can always sign up for a fully functional, free trial of Articulate software. And don’t forget to post your questions and comments in the forums! We’re here to help. For more e-learning tips, examples, and downloads, follow us on Twitter.
8 Comments