Tips for Building Quick and Easy Custom Navigation in Storyline

Articulate Storyline comes with a fabulous, easy-to-customize player skin that works for many different types of e-learning courses. It even includes navigation buttons! But sometimes I need to build an e-learning course that requires a very specific look and feel for the navigation, and I don’t want to use the default player skin.
No problem! I can quickly and easily create my own custom navigation bar in Articulate Storyline with a next and back button that look exactly the way I want.
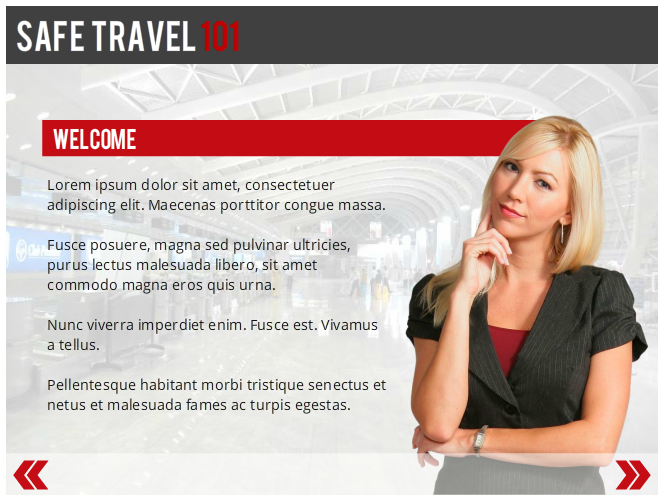
Let me show you how we can take a slide with default navigation, that looks like this:

And turn it into this:

Or this …

Or this …

As you can see, there are many possibilities for creating custom navigation!
Here’s a rundown on my process:
Remove the Default Navigation
To get rid of the “Prev” and “Next” buttons along the bottom of the player skin, you need to go into the slide properties for each slide and de-select the two buttons from slide navigation controls.
You might also want to pop into the player properties and customize the rest of the player to work with the custom navigation look you’re going for.
If you’re looking to make the player invisible, here’s an article describing how you can do that: Here’s How to Create an Invisible Player in Storyline.
Create Your Custom Navigation Buttons
There’s no one way to go about this; it’s all about creating the look you want.
I like to start by adding a long, narrow rectangle along the bottom of my slide. Then I add a “Next” and “Prev” button over the top of this rectangle. I like to use the arrow icons that you can easily add to Storyline buttons, but you might prefer to use text such as “Back” or “Continue”—it’s totally up to you.
The key is that you can customize every aspect of how the navigation looks. Bar or no bar? Buttons on each end or side by side? Icons or text labels? Color? Size? Placement? It’s completely your call.
Once you’ve narrowed down how you want it to look, you need to make those buttons active. To do this, add a hyperlink to each button. The back button will have the trigger to “Jump to previous slide” and the forward button will have the trigger to “Jump to next slide.” When I’m done, my triggers panel looks a bit like this:
TIP: Please note the “Jump to previous slide” trigger goes to the last visited slide and not the previous slide as they are listed in the story view.
Copy/Paste It to the Slide Master
The next step is to move our custom navigation to the slide master. There are a few reasons to do this. First, using the slide master means you don’t need to copy the navigation objects onto each slide one at a time. Second, if you make a change, you don’t want to have to manually change it on each and every slide in your course. This is why it makes sense to use the slide master.
To move everything to the slide master in one fell swoop, hold the CTRL key and select each object in your navigation bar by clicking on it. Then use the keyboard shortcut or right-click menu to cut the objects. Navigate to the slide master view and paste the objects on one of the slides in the panel on the left (any slide except the one at the very top!). I also removed the placeholder items that were on the slide, and renamed the layout “Next and Back Buttons.” You’ll see that the name appears when you hover over the slide. Once I’ve made those changes, the left-hand panel of my slide master view looks like this:

Duplicate and Edit Slides
There might be some instances where it makes sense to only have a “Next” button, or only a “Prev” button. No problem! Duplicate the slide you just created a couple of times. On the first duplicate, remove the back button and rename the layout “Next Button Only.” On the other duplicate, remove the next button and rename the layout “Back Button Only.”

Now you can exit the slide master view. To apply your new layouts to a slide, right-click on a slide, and from the menu that appears choose “Layout” and assign the proper one, depending on the navigation requirements. You could also create a slide master layout that has a “Submit” button, or any custom button that you need.

And there’s a simple process for creating your own custom navigation in Storyline. Remember, Storyline lets you create a course that looks any way you want—the possibilities are endless! I’m curious, do you prefer default or custom nav? Got any tips of your own for creating custom navigation? Leave me a comment below!
Want to try something you learned here, but don’t have Articulate software? Download a free 30-day trial, and come back to E-Learning Heroes regularly for more helpful advice on everything related to e-learning.


17 Comments